Amazon KDP guide, KDP book publishing
Manuscript Template Google Docs: Writer’s Format
Apr
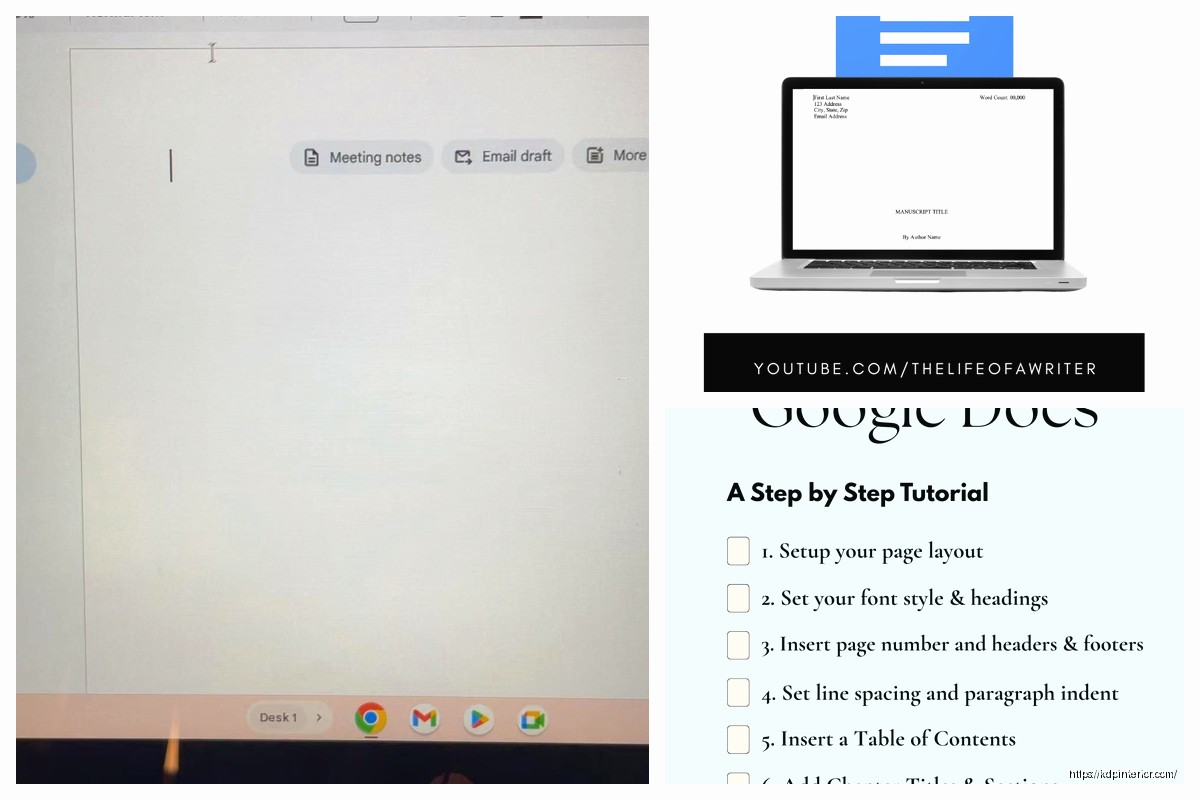
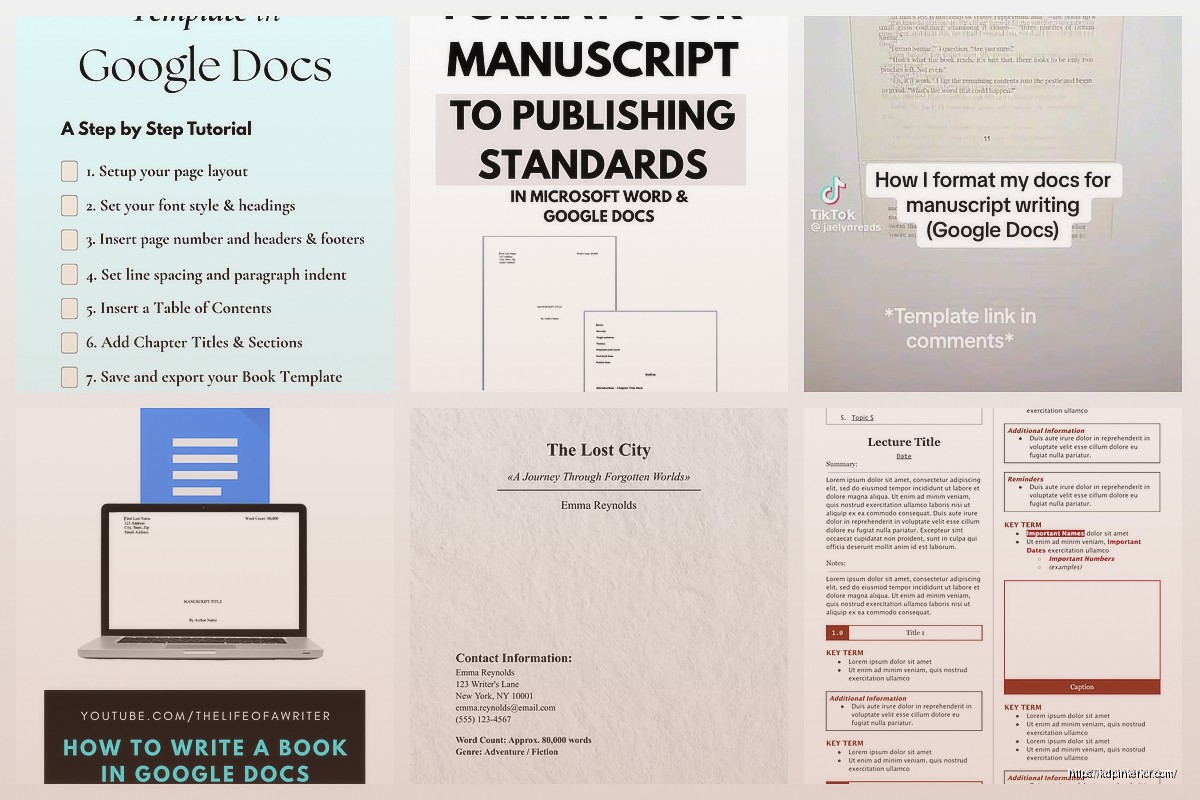
Okay so I literally just set up three manuscript templates in Google Docs last week for a client and here’s what actually works without making yourself crazy.
The Basic Setup Nobody Tells You About
First thing – you gotta understand that Google Docs isn’t Word and it’s never gonna be Word, which is honestly fine because most publishers don’t care as long as your formatting is clean. I spent like two years fighting with Docs trying to make it behave like Word before I realized just… stop doing that.
Start with a blank document. Don’t use any of Google’s templates because they’re weirdly formatted for business stuff and you’ll waste an hour deleting random headers. Page Setup is your first stop – go to File > Page Setup and set your margins to 1 inch all around. Standard manuscript format is basically 1-inch margins, 12pt font, double-spaced, and that’s like 90% of what agents and publishers want to see.
Font Choices That Won’t Get You Rejected
Use Times New Roman or Courier. I know, I know, Times New Roman is boring and Courier looks like a typewriter threw up on your screen, but these are industry standard for a reason. Agents read hundreds of manuscripts and their eyes are trained for these fonts. I had this author once who insisted on using some fancy serif font because it “matched their genre” and three agents literally mentioned the font in their rejection letters.
If you’re self-publishing and just need a clean manuscript for your editor or for formatting later, you can use Arial or Garamond or whatever, but if you’re querying agents? Stick with the boring fonts.
Headers and Page Numbers Setup
This part trips people up constantly. Go to Insert > Headers & footers > Header. In your header you want your last name, the book title (or a shortened version), and the page number. It should look like: Harper / MIDNIGHT COFFEE / 1
Wait I forgot to mention – don’t put a header on your first page. That’s your title page and it stays clean. So you’ll need to check “Different first page” in the header options. Google Docs hides this option in a weird place – when you’re in the header editing mode, look for Options > Header format > Different first page.
Page numbers go in the top right corner of your header, not the footer. I see people put them in footers all the time and it’s not wrong exactly but it’s not standard manuscript format either.
Setting Up Styles Properly
Okay so this is gonna sound weird but you actually want to use Google Docs’ Styles feature even though it’s kind of clunky. Here’s why – if you need to change something later, you can update the style once instead of manually changing 300 chapter headings.
For your body text: highlight a paragraph, make it Times New Roman 12pt, double-spaced (use Format > Line & paragraph spacing > Double), left-aligned. Then go to the Styles dropdown (it says “Normal text” by default) and hover over Normal text > Update ‘Normal text’ to match. Now all your body text will follow this format.
For chapter headings, I usually do this: type “Chapter One” or whatever, center it, maybe make it bold, keep it 12pt (some people go bigger but agents have specifically told me they prefer consistent sizing). Then create a new style for it – Styles > Text styles > Heading 2 > Update to match or create new style.
The Actual Title Page Layout
Your first page should have your contact info in the top left corner:
- Your name
- Street address
- City, state, zip
- Phone number
- Email address
In the top right corner, put your word count rounded to the nearest thousand. So if your manuscript is 87,432 words, you write “87,000 words.”
Then halfway down the page, centered, put your title in ALL CAPS, then underneath put “by” in lowercase, then your name. That’s it. Don’t get fancy with fonts or sizes or anything.
Oh and another thing – if you’re using a pen name, your real name goes in the contact info but your pen name goes as the author on the title page. Publishers need to know who to send the check to.
Chapter Breaks and Scene Breaks
New chapters always start on a new page. In Google Docs, use Insert > Break > Page break. Don’t just hit Enter a bunch of times because that’ll mess up your formatting if you edit anything above it.
For scene breaks within a chapter, the standard is to put a single line with just # centered on it. Some people use three asterisks (***) or three pound signs (###). Doesn’t really matter as long as you’re consistent. My cat literally walked across my keyboard last night and added a bunch of random scene breaks and I didn’t notice until this morning, so uh, proofread your formatting I guess.
The Double-Spacing Thing Everyone Messes Up
Format > Line & paragraph spacing > Double. But here’s the thing nobody tells you – Google Docs adds extra space between paragraphs by default and you need to turn that off. In that same Line & paragraph spacing menu, uncheck “Add space after paragraph.” Otherwise you’ll have double spacing PLUS extra paragraph spacing and it looks weird.
Also make sure you’re indenting your paragraphs. First line of each paragraph should be indented 0.5 inches. The lazy way is to just hit Tab at the start of each paragraph. The proper way is to set up a first-line indent – Format > Align & indent > Indentation options > Special indent > First line > 0.5.
Don’t indent the first paragraph after a chapter heading or scene break though. That first paragraph stays flush left.
Creating a Template You Can Actually Reuse
Once you’ve got everything set up the way you want it, save it as a template. In Google Docs you can’t technically save templates like you can in Word, but here’s the workaround: File > Make a copy. Name it something like “MANUSCRIPT TEMPLATE – DO NOT EDIT” and stick it in a folder.
Every time you start a new project, make a copy of that template and rename it with your new book title. This saves you from reformatting everything from scratch each time.
I keep like five different templates – one for novels, one for short stories, one for non-fiction, one specifically formatted for my editor’s preferences, and one that’s already set up for Kindle formatting. Probably overkill but whatever.
Dealing with Google Docs’ Annoying Auto-Formatting
Turn off smart quotes if you’re gonna be moving this document to other programs later. Tools > Preferences > uncheck “Use smart quotes.” Smart quotes look prettier but they can cause encoding issues when you export to different formats.
Also turn off automatic capitalization and automatic list detection if they annoy you. I personally leave them on but I know writers who hate them.
The auto-correct in Google Docs is honestly pretty bad compared to Word. It misses a lot of stuff. You’ll still need to run everything through a real grammar checker or editor before submitting anywhere.
Exporting Your Manuscript
When you’re ready to send your manuscript somewhere, File > Download. For most agents and publishers, you want .docx (Microsoft Word format). Some might ask for PDF but that’s less common for manuscripts.
If you’re self-publishing and sending to a formatter, they’ll usually want .docx too. If you’re uploading to KDP directly… honestly don’t upload a Google Doc directly to KDP. Export it as .docx first, then upload that. The direct Google Docs integration with KDP is clunky and strips out some formatting.
Collaboration Features for Working with Editors
This is actually where Google Docs shines. Share your document with your editor or beta readers using the Share button. Set their permissions to “Commenter” or “Editor” depending on whether you want them to make direct changes or just suggest them.
Suggestion mode is your friend – when someone has editing access, they can turn on Suggesting (there’s a pencil icon in the top right) and their changes show up as suggestions you can accept or reject. Way better than Track Changes in Word honestly.
You can also use comments by highlighting text and clicking the comment icon. Your editor can leave notes right on specific sentences without cluttering up the actual text.
Version History Is a Lifesaver
File > Version history > See version history. This shows you every auto-save point and any versions you’ve manually named. If you totally mess up your formatting or delete something important, you can restore an earlier version.
I recommend naming versions at major milestones – “First draft complete” or “After developmental edit” or whatever. Click the three dots next to any auto-save timestamp and select “Name this version.”
Formatting Dialogue and Special Elements
Dialogue formatting in manuscripts is the same whether you’re in Google Docs or Word or whatever. New speaker = new paragraph, indent normally, use standard quotation marks.
For italics (internal thoughts, emphasis, foreign words), just use the italic button. Don’t underline for italics like they did in typewriter days – that’s outdated.
For ellipses, use three periods with no spaces between them: … not . . . and definitely not the single ellipsis character because it formats weird in some programs.
Em dashes for interruptions should be—like this with no spaces. Google Docs auto-converts two hyphens into an em dash which is actually helpful.
Front Matter and Back Matter
If you’re setting up a manuscript template for self-publishing, you might want front matter (copyright page, dedication, etc.) and back matter (author bio, other books). Put these on separate pages using page breaks.
For traditional publishing, don’t include any of this in your manuscript. The publisher handles all that. Just send the story itself with your title page at the front.
Mobile Editing and Offline Access
The Google Docs app is actually pretty decent for editing on your phone or tablet. You won’t want to do heavy formatting on mobile but it’s fine for writing or quick edits.
Make sure you enable offline access if you write in places without internet. In Google Docs on desktop, go to Settings (gear icon) > Settings > Offline > Enable offline. Then your recent documents will sync and be available even without WiFi.
Fair warning though – if you make offline edits on multiple devices, sometimes the sync gets confused and you end up with conflicting changes. Always let one device fully sync before opening the document on another device.
Okay so I think that covers the main stuff you need to know for setting up a proper manuscript template in Google Docs. The key is getting your basic formatting right from the start so you’re not fixing it all later when you should be writing. And seriously, save that template so you’re not googling “manuscript format” every time you start a new project.

DISCOVER OUR FREE BEST SELLING PRODUCTS
Editable Canva Lined Journal: Express Your Thoughts – KDP Template
Lined Pages Journal 120 pages Ready to Upload PDF Commercial Use KDP Template 6×9 8.5×11 5×8 for Notebooks, Diaries, Low Content
Lined Pages Journal 120 pages Ready to Upload PDF Commercial Use KDP Template 6×9 8.5×11 5×8 for Notebooks, Diaries, Low Content
Cute Dogs Coloring Book for Kids | Activity Book | KDP Ready-To-Upload
Daily Planner Diary : Diary Planners for Everyday Productivity, 120 pages, 6×9 Size | Amazon KDP Interior
Wolf Coloring KDP interior For Adults, Used as Low Content Book, PDF Template Ready To Upload COMMERCIAL Use 8.5×11"
Coloring Animals Head Book for Kids, Perfect for ages 2-4, 4-8 | 8.5×11 PDF
Printable Blank Comic Book Pages PDF : Create Your Own Comics – 3 Available Sizes
Notes KDP interior Ready To Upload, Sizes 8.5×11 6×9 5×8 inch PDF FILE Used as Amazon KDP Paperback Low Content Book, journal, Notebook, Planner, COMMERCIAL Use
Black Lined Journal: 120 Pages of Black Lined Paper Perfect for Journaling, KDP Notebook Template – 6×9
Student Planner Journal 120 pages Ready to Upload PDF Commercial Use KDP Template 6×9" 8.5×11" for Low Content book
Recipe Journal Template – Editable Recipe Book Template, 120 Pages – Amazon KDP Interior