Amazon KDP guide, KDP book publishing
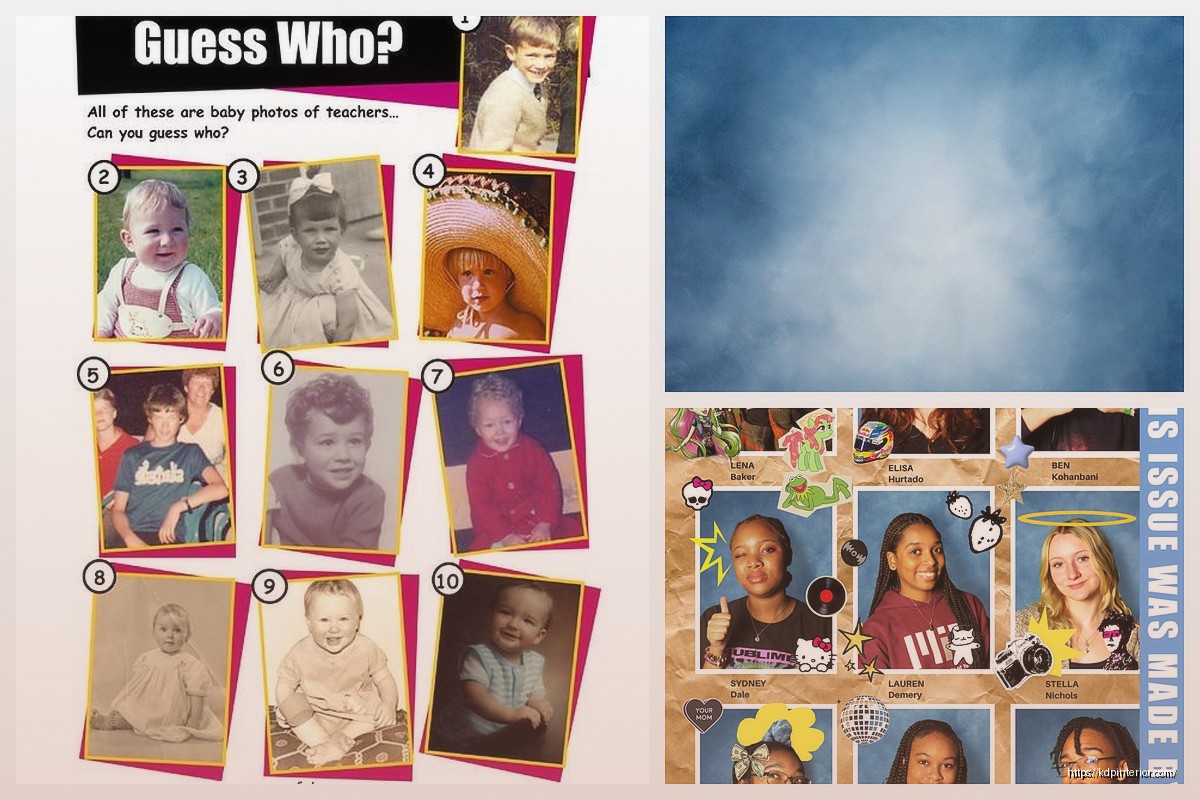
Year Book Template: School & Company Annuals

Apr
Okay so I just finished helping someone set up their yearbook template last week and honestly the whole process is way less complicated than people think but there are some weird gotchas nobody tells you about.
The Basic Template Structure You Actually Need
Right so first thing – you need to decide if you’re doing this for print or digital because that changes EVERYTHING. Most school yearbooks are still print obviously but I’ve been seeing more companies go digital for their annual reports slash yearbook things because distribution is easier.
For print you’re looking at standard sizes like 8.5×11 or the slightly fancier 9×12. The 9×12 looks more professional honestly but it costs more to print obviously. I usually tell people to go with 8.5×11 portrait for schools under 300 students and 9×12 landscape for anything bigger because you need the spread space for group photos.
Your template needs like four main sections minimum:
- Cover and intro pages (title page, principal’s message, that stuff)
- Student or employee portraits – this is the bulk of it
- Events and activities throughout the year
- Candid moments and special achievements
Wait I forgot to mention – set up your master pages FIRST before you do anything else. This screwed me up so bad on my first yearbook project back in 2018. I designed like 30 pages before realizing I needed consistent headers and page numbers and had to redo everything.
Software Options That Don’t Suck
So everyone’s gonna tell you to use InDesign and yeah it’s the industry standard but honestly if you’re doing a small school yearbook or company annual you can get away with Canva Pro or even PowerPoint if you know what you’re doing. I know that sounds weird but hear me out.
InDesign is great if you need advanced typography controls and you’re working with a committee of people who know design. But the learning curve is steep and it’s $54/month which adds up fast.
Canva Pro ($13/month) has actual yearbook templates now and they’re not terrible. I used one for a charter school project last year and it turned out pretty decent. The main limitation is you can’t do complex text wrapping around images the way you might want to. But for straightforward layouts it works.
The thing nobody talks about is Microsoft Publisher – yeah it’s old school but if your school already has Office 365 it’s included and the templates are actually pretty solid for basic yearbooks. I wouldn’t use it for a 200-page production but for a 50-page company annual? Totally fine.
Print Specs You Gotta Get Right
This is gonna sound boring but mess this up and your printer will charge you a rush fee to fix it or worse just print it wrong. Been there.
Your bleed needs to be 0.125 inches (that’s 1/8 inch) on all sides. This means your design extends past the trim line so when they cut the pages you don’t get white edges. I see people forget this constantly.
Resolution needs to be 300 DPI minimum for photos. Not 72 DPI which is what comes off phones usually. You need to actually check this because yearbooks are full of photos from students’ phones and they look fine on screen but print out blurry as hell.
Color mode is CMYK for print not RGB. This is super important because that bright blue that looks great on your monitor will print out purple-ish if you don’t convert it properly. I learned this the hard way on my second yearbook project and had to eat the reprint cost.
Oh and another thing – font embedding. Make sure your PDF has all fonts embedded or the printer will substitute them with whatever they have and your carefully chosen typography will look completely different.
Layout Strategies That Actually Work
So for student portrait pages you’ve got a few standard layouts. The classic grid is still the most space-efficient – usually 4 across by 5 down for high school seniors, smaller photos for underclassmen.
But here’s what I do that makes it less boring – alternate the grid layouts every few pages. Do one spread with the standard grid, then the next spread do a mosaic layout with varying photo sizes. It breaks up the monotony without looking chaotic.
For company annuals you have more flexibility because you’re not trying to fit 300 headshots. I usually do like 2-3 employees per page with more white space and pull quotes about their achievements or funny moments from the year.
The Photo Collection Nightmare
Okay this is where most yearbook projects fall apart completely. You need a system for collecting photos from everyone and it needs to be SIMPLE or people won’t do it.
I use Google Forms connected to a shared Drive folder. The form asks for their name, grade or department, and has a file upload field. This automatically dumps everything into organized folders and you can see who hasn’t submitted yet.
Don’t do email collection. Just don’t. You’ll have 47 different email threads and lose track of who sent what. Trust me on this.
Set a hard deadline and then send reminders one week before and two days before. You’ll still get submissions after the deadline but at least you tried.
Photo requirements should be:
- Minimum 1MB file size
- Head and shoulders shot with plain background (for portraits)
- No filters or heavy editing
- Submit by [date] or you get the placeholder silhouette
That last point sounds harsh but it’s the only thing that actually motivates people to submit on time.
Theme and Design Consistency
Pick like 2-3 main colors max and stick with them throughout. I see people try to do rainbow themes with different colors for each section and it just looks messy.
For schools you can tie the colors to school colors obviously. For companies I usually go with brand colors plus one accent color for visual interest.
Font-wise you need a heading font and a body font. That’s it. Maybe a third accent font for pull quotes if you really want but that’s pushing it. Too many fonts makes it look like a ransom note.
I’m currently watching Succession while working on templates and honestly the clean corporate aesthetic from that show is perfect inspiration for company annuals – lots of white space, strong typography, professional photos.
Page Templates You Need
Create these as master templates before you start:
Standard portrait page – your grid layout for headshots with name and title/grade underneath
Event spread – 2 pages with 4-6 photos of varying sizes, captions, and a headline describing the event
Candid collage page – looser layout with 8-12 smaller photos capturing random moments
Feature page – for spotlighting a specific person, achievement, or department with larger photos and more text
Divider pages – clean pages that separate major sections with just a title and maybe a graphic element
Having these ready means you can just drop content in instead of designing every single page from scratch which will make you wanna quit halfway through.
Content Organization Tips
This is gonna sound obvious but make a spreadsheet listing every page number and what goes on it before you start designing. Seriously. I skipped this step once and ended up with duplicate content and missing sections.
Your spreadsheet should have columns for:
- Page number
- Section (portraits, events, etc)
- Specific content (Freshman portraits, Homecoming photos, etc)
- Status (not started, in progress, complete)
- Notes (missing photos, needs captions, whatever)
This also helps if you’re working with a team because everyone can see what’s done and what still needs work.
Pricing Out Print Options
So for actual printing you’ve got a few routes. School yearbooks usually go through specialized yearbook companies like Jostens or Herff Jones. They handle everything including the online ordering system for parents which is convenient but you pay for that convenience.
For company annuals or smaller school projects you can use regular print-on-demand services. I’ve used Blurb and Mixam and both are solid. Mixam is cheaper for bulk orders over 50 copies.
The per-unit cost drops dramatically with volume. Like you might pay $25 per book for 25 copies but only $12 per book for 100 copies. Run the numbers based on how many you actually need.
Oh and get a proof copy first. Always. Even if you checked everything on screen there will be something that looks different in print. It costs an extra week and like $30 but it’s worth it to catch problems before printing 200 copies.
Digital Yearbook Alternatives
If you wanna skip print entirely you can do a digital PDF yearbook. Way cheaper obviously and you can include video clips which is pretty cool.
I made one for a tech startup last year that had embedded video messages from the CEO and clips from their annual conference. You can’t do that in print obviously.
For distribution you can host it on your website, send it via email, or use a platform like Issuu that makes it look like a flipbook. Issuu’s free tier works fine for small projects.
The downside is people don’t value digital yearbooks the same way. There’s something about having a physical book you can sign and keep on your shelf. But for companies doing annual reports that nobody really wants to store anyway digital makes more sense.
Timeline Planning
Work backwards from when you need the final product. If you need books in hand by June 1st for graduation you probably need to send files to the printer by April 15th which means design needs to be done by April 1st which means photo collection needs to close by March 1st.
That March to April window is for design, getting approvals, making revisions, and dealing with all the last-minute “can we add this photo” requests that will definitely happen.
My dog just knocked over my coffee which is perfect timing because I need a break anyway but okay last few things.
Common Mistakes to Avoid
Don’t use too many different photo filters or effects. Pick one style and stick with it. I see yearbooks where some photos are black and white, some are sepia, some have vignettes – it looks inconsistent.
Don’t put important text or faces right at the edge of pages especially near the spine. You need like a half-inch margin minimum or it’ll get lost in the binding.
Don’t forget page numbers. Sounds basic but I’ve seen it happen and it makes the yearbook feel unfinished.
Don’t use super trendy fonts or design elements. Remember this yearbook will be looked at 20 years from now and that font that seems cool now will look dated. Stick with classic typography.
Getting Approval and Feedback
Build in review time with whoever’s in charge – principal, HR director, yearbook committee, whatever. Send them PDF proofs of like 10 sample pages showing different sections before you design all 100+ pages.
This saves you from doing a ton of work in a direction they don’t like. Get their feedback early and incorporate it into your templates.
For final approval I usually do a full PDF review where they check every page. Give them a deadline for feedback – like 5 business days – and make it clear that changes after that will delay printing.
The reality is you’ll never make everyone completely happy. There’s always someone who wants their photo bigger or doesn’t like the font choice. At some point you gotta just make decisions and move forward or you’ll be stuck in revision hell forever.
Anyway that’s pretty much the whole process. It’s a lot of moving parts but if you stay organized and use templates it’s totally manageable even for your first time doing it.

DISCOVER OUR FREE BEST SELLING PRODUCTS
Editable Canva Lined Journal: Express Your Thoughts – KDP Template
Lined Pages Journal 120 pages Ready to Upload PDF Commercial Use KDP Template 6×9 8.5×11 5×8 for Notebooks, Diaries, Low Content
Lined Pages Journal 120 pages Ready to Upload PDF Commercial Use KDP Template 6×9 8.5×11 5×8 for Notebooks, Diaries, Low Content
Cute Dogs Coloring Book for Kids | Activity Book | KDP Ready-To-Upload
Daily Planner Diary : Diary Planners for Everyday Productivity, 120 pages, 6×9 Size | Amazon KDP Interior
Wolf Coloring KDP interior For Adults, Used as Low Content Book, PDF Template Ready To Upload COMMERCIAL Use 8.5×11"
Coloring Animals Head Book for Kids, Perfect for ages 2-4, 4-8 | 8.5×11 PDF
Printable Blank Comic Book Pages PDF : Create Your Own Comics – 3 Available Sizes
Notes KDP interior Ready To Upload, Sizes 8.5×11 6×9 5×8 inch PDF FILE Used as Amazon KDP Paperback Low Content Book, journal, Notebook, Planner, COMMERCIAL Use
Black Lined Journal: 120 Pages of Black Lined Paper Perfect for Journaling, KDP Notebook Template – 6×9
Student Planner Journal 120 pages Ready to Upload PDF Commercial Use KDP Template 6×9" 8.5×11" for Low Content book
Recipe Journal Template – Editable Recipe Book Template, 120 Pages – Amazon KDP Interior