Amazon KDP guide, KDP book publishing
Amazon KDP Book Cover Template: Design Specs & Downloads
Mar
Okay so the cover dimensions thing trips up literally everyone when they start with KDP and honestly I still double-check mine every single time because getting it wrong means you waste like three hours redoing everything.
The Basic Specs You Actually Need
The cover template depends entirely on your page count and trim size. KDP doesn’t just let you upload whatever size you want – they calculate the spine width based on how many pages you’ve got and what paper type you’re using. So like, a 200-page book on white paper has a different spine than a 200-page book on cream paper because cream is slightly thicker.
The most common trim sizes people use are 6×9 inches for most books, 5×8 for smaller novels, and 8.5×11 for workbooks or planners. I probably do 6×9 about 70% of the time just because readers expect that size for non-fiction and it looks professional on the shelf.
Front and Back Cover Math
Your front cover is just your trim size. So if you’re doing 6×9, your front cover is 6 inches wide by 9 inches tall. The back cover is the same dimensions. Easy enough right?
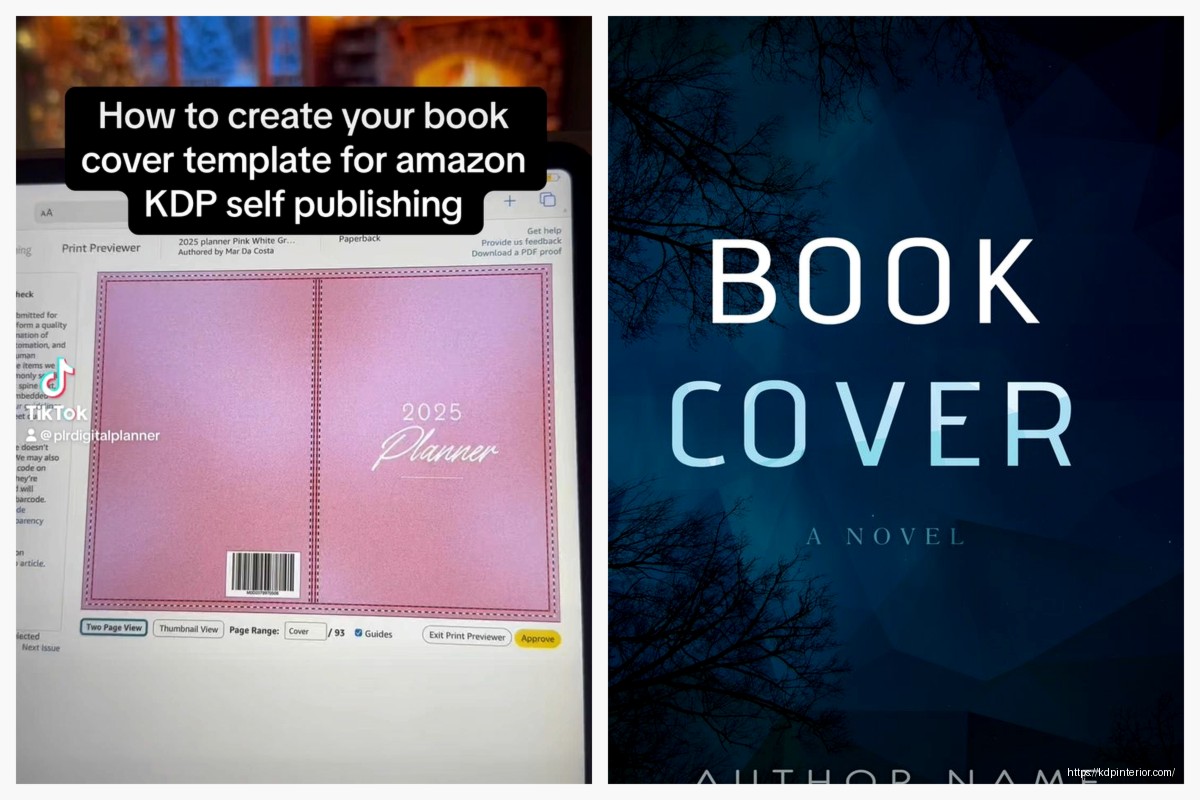
But then you gotta add the spine width and this is where people mess up. You can’t just guess the spine width – you need to use KDP’s cover calculator tool. It’s buried in their help section but honestly just Google “KDP cover calculator” and it’ll pop right up.
I was designing a cover last month while my cat kept walking across my keyboard and I accidentally used the wrong page count in the calculator. Uploaded the whole thing and KDP rejected it immediately because the spine was like 0.2 inches off. So yeah, measure twice upload once or whatever that saying is.
Bleed Requirements That’ll Save Your Butt
KDP requires 0.125 inches of bleed on all sides. That’s the extra space around your cover that gets trimmed off during printing. If you don’t include bleed, your cover will have weird white edges or get rejected.
So your full cover dimensions are actually: (back cover width + spine width + front cover width + 0.25 inches) by (height + 0.25 inches). The 0.25 is the bleed on both sides – 0.125 left and 0.125 right, or top and bottom.
For a 6×9 book with a 0.5 inch spine, that works out to:
- Width: 6 + 0.5 + 6 + 0.25 = 12.75 inches
- Height: 9 + 0.25 = 9.25 inches
And you need to design at 300 DPI minimum. I always work at 300 DPI because anything less looks pixelated when printed. Trust me, I learned this the hard way with my first journal back in like 2018.
The Safe Zone Thing Nobody Explains Well
Okay so beyond the bleed, there’s also a “safe zone” which is basically the area where you shouldn’t put important text or images because they might get cut off during trimming. The safe zone is 0.125 inches INSIDE the trim line.
So if you’ve got your title text, make sure it’s at least 0.125 inches away from where the actual edge of the book will be. Same with barcodes, author names, anything that needs to be readable.
I usually create guides in Photoshop or whatever design software at:
- The outer edge (bleed line)
- The trim line (where the book actually gets cut)
- The safe zone (0.125 inches inside the trim)
- The spine center line
This is gonna sound weird but I color-code my guides – red for bleed, blue for trim, green for safe zone. Makes it way easier to see what’s what when you’re zoomed in working on details.
Where to Actually Get Templates
KDP provides templates for every trim size and page count combo. When you’re setting up your paperback in KDP, there’s a link during the cover upload step that says “download a cover template” or something like that. Click that, enter your specs, and it generates a PNG or PDF template with all the guides already marked.
I always download the PNG version because it’s easier to work with in Photoshop. The PDF works fine too if you’re using something like Affinity Designer or Illustrator.
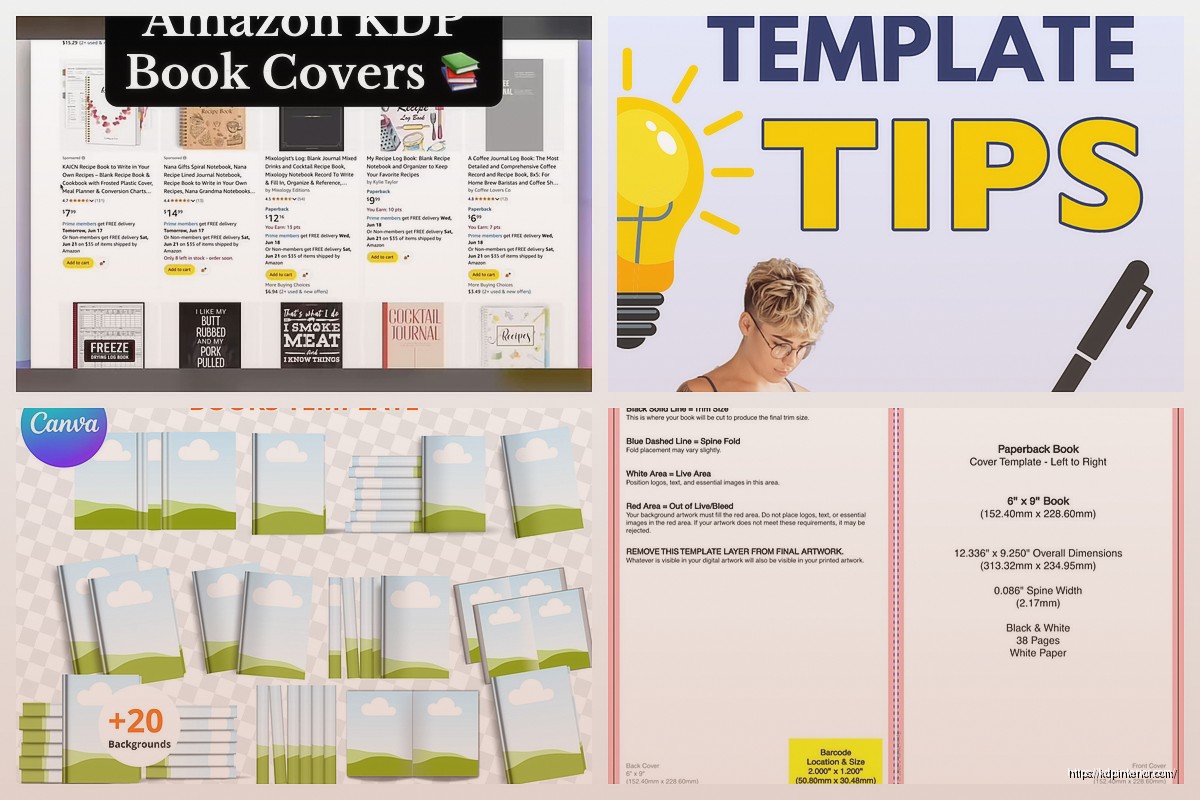
Oh and another thing – Canva has KDP templates built in now. If you go to Canva and search for “KDP cover” they’ve got templates for common sizes. But here’s the catch: their templates are generic and don’t account for your specific spine width. So you can use them as a starting point but you’ll need to adjust the dimensions based on your actual page count.
Third-Party Template Sites
There are sites like BookBolt and KDP Tools that generate templates too. BookBolt is like $10/month I think? And they’ve got this whole dashboard where you can input your book specs and download print-ready templates. I used it for a few months when I was pumping out a ton of low-content books but honestly the free KDP templates work just fine.
Creative Fabrica also has pre-made cover templates you can buy, but those are more like design templates with graphics already included. Different thing entirely.
Common Mistakes I See All The Time
People upload covers in RGB color mode instead of CMYK. Your screen displays colors in RGB but printers use CMYK, so if you don’t convert your file, the colors will look different when printed. Like, that bright blue you picked might come out looking purple-ish.
I convert to CMYK before I export the final file. In Photoshop it’s Image > Mode > CMYK Color. Some colors will shift a bit when you convert and that’s normal – better to see it before you print than after.
Another mistake is using low-resolution images. If you’re pulling images from Google or wherever, make sure they’re high enough quality. At 300 DPI for a 6×9 cover, you need images that are at least 1800×2700 pixels for the front cover alone. Anything smaller will look blurry.
Wait I forgot to mention – the spine text needs to read from bottom to top when looking at the spine. Like if the book is laying face-up, the spine text should be oriented so you can read it when the book is standing on a shelf with the front cover facing right. KDP will reject it if the spine text is upside down.
File Format and Upload Specs
KDP accepts PDF, TIFF, and JPG files for covers. I always use PDF because it preserves the quality and doesn’t compress the file like JPG does. When exporting from Photoshop, I use the “Save As PDF” option and make sure the quality is set to maximum.
Your file size can’t exceed 650 MB but honestly if your cover file is anywhere close to that, something’s wrong. My covers are usually between 10-50 MB depending on how many design elements I’ve got.
Make sure you flatten all your layers before exporting. KDP doesn’t need your working layers and it just makes the file bigger. In Photoshop: Layer > Flatten Image, then export.
The Barcode Situation
KDP adds the ISBN barcode automatically on the back cover, so you don’t need to design space for it or include one yourself. They put it in the bottom right corner of the back cover. If you’ve got important design elements or text in that area, move them because KDP will just slap the barcode right on top.
The barcode area is roughly 2×1.2 inches, so just keep that bottom right corner relatively clear.
Tools I Actually Use for Designing
I use Photoshop for like 90% of my covers because I’m comfortable with it and I’ve got templates set up. But it’s expensive if you’re just starting out. Alternatives that work great:
- GIMP – free, works on Mac and Windows, basically Photoshop lite
- Canva – easiest for beginners, has pre-made elements, but limited for complex designs
- Affinity Designer or Photo – one-time purchase, no subscription
- Photopea – free browser-based editor that’s surprisingly powerful
I was watching that show The Bear the other night and got distracted thinking about cover design for a cookbook, which is random but anyway – for any design tool you use, just make sure it can handle 300 DPI and CMYK color mode.
Testing Your Cover Before Upload
Before you upload to KDP, zoom in to like 400% and check for any weirdness. Pixelation, text that’s too close to the edge, colors that look off. I’ve caught so many mistakes this way.
Also print a test copy. I know it costs money but it’s worth it. The cover might look perfect on your screen and then you get the physical book and realize the colors are way darker or the text is smaller than you thought. KDP lets you order author copies for cheap – usually like $3-5 plus shipping depending on page count.
For my first few books I didn’t order test copies and I regretted it every time. One cover had text that was way too small to read comfortably and I only realized after I’d already published and gotten a few sales.
The Three-Book Test
If you’re doing a series, order test copies of multiple books and put them next to each other on a shelf. Do the spines line up properly? Do the colors match across books? Is the branding consistent? This stuff matters more than you’d think for reader perception.
Quick Reference for Popular Trim Sizes
Here’s what I use most often:
6×9 inches (most common for non-fiction, memoirs)
- Standard for business books, self-help, how-to guides
- Page count usually between 100-300 pages
- Spine width varies from 0.2 to 0.6 inches typically
5×8 inches (novels, fiction)
- Compact size readers expect for fiction
- Feels more “book-like” for novel readers
- Cheaper to produce than larger sizes
8.5×11 inches (workbooks, planners, coloring books)
- Maximum usable space for activities
- Higher printing cost but you can charge more
- Spine width gets chunky fast – 200 pages is like 0.5 inches
The trim size affects everything – your cover dimensions, your production cost, your competitive pricing, how readers perceive the book. I spent way too long figuring this out when I should’ve just tested different sizes earlier on.
Hardcover vs Paperback Specs
Hardcover templates are different because the cover wraps around the boards and there’s that dust jacket overhang. KDP’s hardcover specs include an extra 3 inches of width for the flaps – 1.5 inches on each side that fold inside the cover.
So a 6×9 hardcover with a 0.5 inch spine needs:
- Width: 1.5 + 6 + 0.5 + 6 + 1.5 + 0.25 (bleed) = 15.75 inches
- Height: 9 + 0.25 (bleed) = 9.25 inches
Hardcovers also use a different paper stock so the spine calculation is different even with the same page count. Always use KDP’s calculator for hardcover specs because eyeballing it will definitely result in rejection.
I honestly don’t do many hardcovers because the production cost is like 3x higher but they’re great for premium books or gift-type products.
What To Do When KDP Rejects Your Cover
They’ll send you an email explaining what’s wrong. Usually it’s one of these issues:
- Wrong dimensions (spine width miscalculated)
- Image resolution too low
- File format not supported
- Cover doesn’t meet content guidelines (inappropriate images, misleading text)
The rejection email tells you specifically what needs to be fixed. Don’t panic, just adjust and re-upload. I’ve had covers rejected probably 20+ times over the years for various dumb reasons.
One time I uploaded a cover where the spine text was literally 2 pixels off-center and they rejected it. I was annoyed but also impressed they caught that.
Just download a fresh template with your exact specs, overlay your design, double-check everything, and upload again. Usually fixes it.
DISCOVER OUR FREE BEST SELLING PRODUCTS
Editable Canva Lined Journal: Express Your Thoughts – KDP Template
Lined Pages Journal 120 pages Ready to Upload PDF Commercial Use KDP Template 6×9 8.5×11 5×8 for Notebooks, Diaries, Low Content
Lined Pages Journal 120 pages Ready to Upload PDF Commercial Use KDP Template 6×9 8.5×11 5×8 for Notebooks, Diaries, Low Content
Cute Dogs Coloring Book for Kids | Activity Book | KDP Ready-To-Upload
Daily Planner Diary : Diary Planners for Everyday Productivity, 120 pages, 6×9 Size | Amazon KDP Interior
Wolf Coloring KDP interior For Adults, Used as Low Content Book, PDF Template Ready To Upload COMMERCIAL Use 8.5×11"
Coloring Animals Head Book for Kids, Perfect for ages 2-4, 4-8 | 8.5×11 PDF
Printable Blank Comic Book Pages PDF : Create Your Own Comics – 3 Available Sizes
Notes KDP interior Ready To Upload, Sizes 8.5×11 6×9 5×8 inch PDF FILE Used as Amazon KDP Paperback Low Content Book, journal, Notebook, Planner, COMMERCIAL Use
Black Lined Journal: 120 Pages of Black Lined Paper Perfect for Journaling, KDP Notebook Template – 6×9
Student Planner Journal 120 pages Ready to Upload PDF Commercial Use KDP Template 6×9" 8.5×11" for Low Content book
Recipe Journal Template – Editable Recipe Book Template, 120 Pages – Amazon KDP Interior