Amazon KDP guide, KDP book publishing
Amazon Paperback Template: Interior Design Standards
Mar
Okay so Amazon’s paperback templates are honestly way more particular than most people realize when they first start out. I spent like three days last month wrestling with a planner interior that kept getting rejected because I didn’t understand the bleed requirements properly and it was driving me nuts.
First thing – you gotta download the actual template directly from KDP for your specific trim size. Don’t just guess the margins or use some random template you found on Etsy or whatever. Amazon has specific templates for every trim size they offer, and the margins are different for each one. Like a 6×9 has different requirements than an 8.5×11, obviously, but even the gutter margins change based on page count which I didn’t know for my first like 50 books.
The gutter is the inside margin where the binding happens. Amazon calculates this automatically in their templates based on your page count. More pages means thicker book means you need a wider gutter so text doesn’t disappear into the spine. I’ve seen so many self-published books where the text curves into the binding and you can’t read it without cracking the spine – that’s someone who didn’t use the proper gutter width.
Bleed vs No Bleed Interiors
So here’s where it gets specific. You need to decide if you want bleed or no bleed before you even start designing. Most low-content books don’t need bleed honestly. Bleed is when your design elements extend past the trim line to the edge of the page. If you’re just doing text-based stuff like journals with prompts or lined notebooks, no bleed is totally fine and actually easier.
But if you’re doing something with background colors, borders that touch the page edge, or full-page designs, you need bleed. The bleed area is 0.125 inches (that’s 1/8 inch) on all sides that extend beyond your final trim size. So for a 6×9 book with bleed, you’re actually designing on a 6.25 x 9.25 inch canvas.
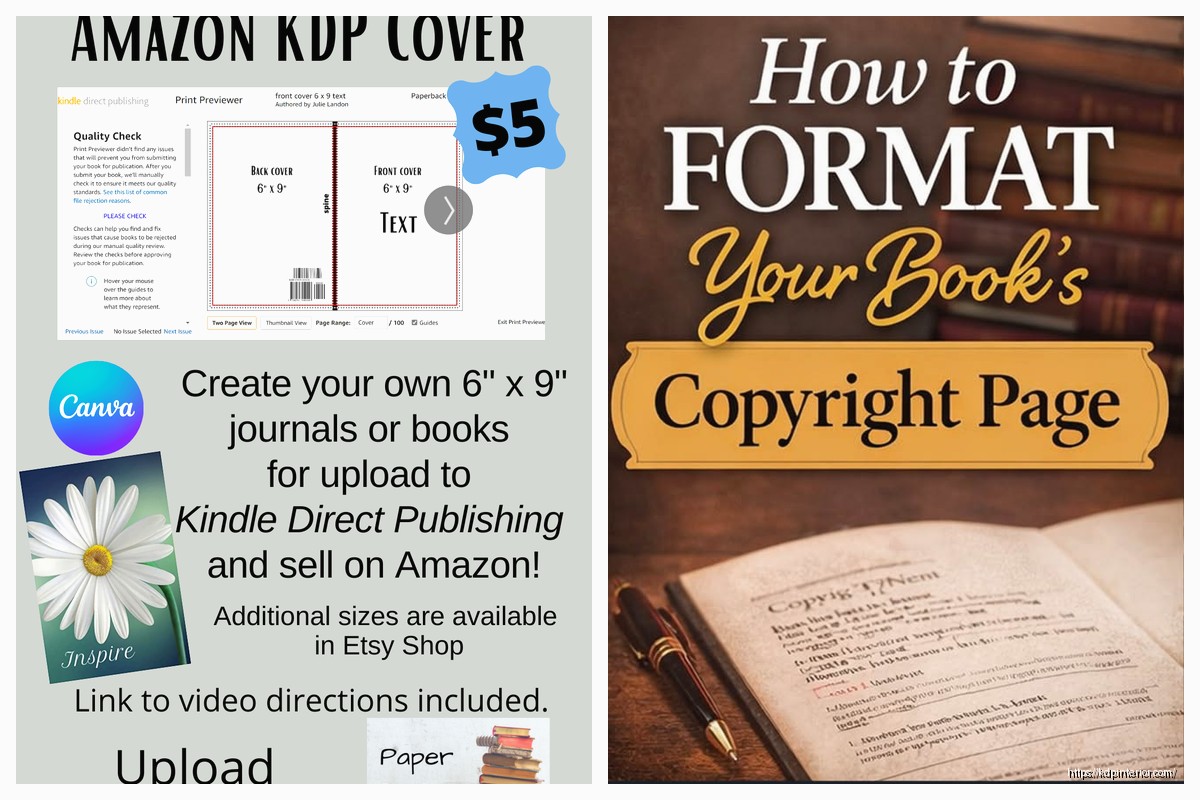
Wait I forgot to mention – the safety margin. This is probably the most important thing that people mess up. Amazon requires a 0.25 inch safety margin on the outside, top, and bottom edges. For the gutter it varies but usually 0.375 to 0.5 inches depending on page count. Nothing important – no text, no page numbers, no critical design elements – should go in the areas outside the safety margins.
I literally had a gratitude journal rejected four times because I put the page numbers too close to the bottom edge. They were like 0.2 inches from the bottom and Amazon was like nope, resubmit. So frustrating.
Setting Up Your Document Correctly
Most people use Microsoft Word, Adobe InDesign, or Canva for interiors. I bounce between all three depending on the project. Word is actually fine for simple text-based interiors, don’t let anyone tell you different. InDesign is overkill unless you’re doing complex layouts.
In Word, you gotta set up custom page sizes. Don’t just pick “Letter” size and hope for the best. Go to Layout > Size > More Paper Sizes and enter your exact trim size. If you’re doing bleed, add 0.25 inches to both dimensions. Then set your margins to match Amazon’s requirements – check the template guide for your specific trim size.
One thing that messed me up for months – Word’s gutter margin setting is different than KDP’s gutter requirement. In Word, you’d set the “inside” margin to match KDP’s gutter width. I was setting the gutter option in Word thinking I was being smart and my files kept coming out wrong.
Font Choices and Readability
Amazon doesn’t restrict fonts but they do reject books for readability issues. Stick with clean, legible fonts. For body text I usually use Garamond, Georgia, or Times New Roman for more traditional books. For low-content planners and journals, sans-serif fonts like Arial, Helvetica, or Calibri work better.
Font size matters more than people think. 10pt is usually minimum for body text, but I go with 11pt or 12pt for most projects. Page numbers can be smaller – 9pt is fine. Headers can be bigger obviously.
Oh and another thing – font licensing. Make sure any fonts you use are licensed for commercial use. Most system fonts on your computer are fine, but if you download fancy fonts from the internet, check the license. I’ve heard stories of authors getting cease and desist letters months after publishing because they used a font illegally.
Line Spacing and Paragraph Formatting
Line spacing should be 1.15 to 1.5 for most books. Single spacing looks cramped, double spacing wastes too much space and makes your book unnecessarily long. I usually go with 1.25 or 1.3 as a sweet spot.
For paragraph formatting, you’ve got two main options – first line indent or block paragraphs with space between. Don’t do both, that’s amateur hour. Traditional books use first line indent (about 0.3 to 0.5 inches) with no space between paragraphs. Block style has no indent but adds space between paragraphs.
My dog just knocked over my coffee and I gotta say, designing interiors at 11pm is probably not my best work schedule but here we are.
Headers, Footers, and Page Numbers
Page numbers are usually required for books over like 24 pages. You can put them centered at the bottom, or on the outside corners (right side on odd pages, left side on even pages). The outside corner thing looks more professional honestly.
Headers are optional but nice for longer books. You can put the book title on even pages and chapter title on odd pages, or just the book title on every page. Keep headers in the safety zone – at least 0.5 inches from the top edge.
Front matter pages (title page, copyright page, table of contents) usually don’t have page numbers showing even though they count in the page count. You can start visible page numbers with chapter one or your first content page.
This is gonna sound weird but I don’t number the front matter in most of my low-content books. Like a journal doesn’t need a table of contents, so I just start page 1 on the first usable page.
Page Count Requirements
Amazon requires minimum 24 pages for paperbacks, maximum 828 pages for black and white. Most low-content books are between 100-120 pages which is a good thickness – not too thin, not too expensive to print.
Your page count must be divisible by 2 because pages are printed on both sides. But actually Amazon’s system rounds up automatically if you submit an odd number, so it’s not a huge deal. Still, plan for even numbers to avoid blank pages appearing where you don’t want them.
Color vs Black and White Interiors
Black and white is way cheaper to print and most paperbacks use it. Color interiors cost significantly more – like $3-4 more per copy for a 100-page book. Only use color if it’s essential for your content.
If you’re doing black and white, make sure your document is actually in grayscale, not RGB or CMYK with black and white colors. Amazon converts everything but you’ll get better results if you set it up correctly from the start.
I submitted a coloring book once with the interior set as color when I meant to do black and white. Didn’t notice until after approval and the printing cost was $7.50 instead of $2.80. Had to redo the whole thing. Cost me like three hours.
File Format and Resolution
Amazon accepts PDF files for interiors. Don’t upload Word docs or InDesign files directly – always export to PDF first. The PDF should be flattened with fonts embedded. Most programs have a “PDF/X-1a” or “Press Quality” export option that works perfectly.
For any images in your interior, use 300 DPI minimum. 600 DPI is better for line art or detailed graphics. Lower resolution images will look blurry or pixelated when printed, and Amazon might reject them for quality issues.
Images should be in grayscale for black and white books, CMYK for color books (not RGB even though it looks fine on screen). The color space thing tripped me up when I started because RGB colors don’t translate well to print.
Testing Your Interior Before Upload
Always always always order a proof copy before you make your book live. I know it costs money and time but you’ll catch so many issues that don’t show up on screen. Text that looked fine on your monitor might be too close to the margins in print. Colors might look different. The binding might eat some of your gutter text.
I use Amazon’s online previewer tool too but it’s not perfect. It’ll catch obvious margin violations and missing bleeds, but it won’t show you exactly how the physical book feels and looks.
Wait I forgot to mention margins for the spine – you can’t put anything on the spine unless your book is over 130 pages thick. Amazon calculates spine width automatically based on page count and paper type. Most low-content books aren’t thick enough for spine text, and that’s fine.
Common Rejection Reasons
The main reasons Amazon rejects paperback interiors are margin violations, bleed issues, and quality problems. I’ve gotten all of them at some point.
Margin violations mean you have text or important elements outside the safety zone. Fix this by increasing your margins or moving your content inward. Page numbers are the usual culprit.
Bleed issues happen when you selected bleed during setup but your PDF doesn’t extend to the bleed edge, or vice versa. Make sure your canvas size matches what you told Amazon you’re uploading.
Quality problems are vaguer – could be low resolution images, unreadable fonts, or content that’s just messy looking. Amazon’s pretty subjective on this one honestly.
Paper Type Considerations
Amazon offers white paper and cream paper. Cream paper looks more traditional and is easier on the eyes for text-heavy books. White paper makes images pop more and is better for workbooks or journals where people write in them.
The paper type affects your margins slightly because cream paper is thicker, which affects the spine width calculation. Not a huge deal but worth knowing.
I usually use cream for novels or text books, white for planners and activity books. Personal preference mostly.
Specific Trim Sizes That Work Best
6×9 is the most popular trim size for most books – novels, non-fiction, journals. It’s comfortable to hold and looks professional. 8.5×11 is standard for workbooks, planners, and activity books. 5×8 is nice for smaller books or gift books.
I’ve done weird sizes like 5.25×8 and 7×10 but honestly they don’t sell as well. People expect standard sizes. The printing cost is the same anyway so there’s no advantage to odd dimensions.
Okay so that’s basically everything I’ve learned from doing this for seven years and screwing up more times than I can count. The main thing is just download Amazon’s actual template, follow their margin requirements exactly, and order a proof before going live. Most problems are caught by just doing those three things properly.

DISCOVER OUR FREE BEST SELLING PRODUCTS
Editable Canva Lined Journal: Express Your Thoughts – KDP Template
Lined Pages Journal 120 pages Ready to Upload PDF Commercial Use KDP Template 6×9 8.5×11 5×8 for Notebooks, Diaries, Low Content
Lined Pages Journal 120 pages Ready to Upload PDF Commercial Use KDP Template 6×9 8.5×11 5×8 for Notebooks, Diaries, Low Content
Cute Dogs Coloring Book for Kids | Activity Book | KDP Ready-To-Upload
Daily Planner Diary : Diary Planners for Everyday Productivity, 120 pages, 6×9 Size | Amazon KDP Interior
Wolf Coloring KDP interior For Adults, Used as Low Content Book, PDF Template Ready To Upload COMMERCIAL Use 8.5×11"
Coloring Animals Head Book for Kids, Perfect for ages 2-4, 4-8 | 8.5×11 PDF
Printable Blank Comic Book Pages PDF : Create Your Own Comics – 3 Available Sizes
Notes KDP interior Ready To Upload, Sizes 8.5×11 6×9 5×8 inch PDF FILE Used as Amazon KDP Paperback Low Content Book, journal, Notebook, Planner, COMMERCIAL Use
Black Lined Journal: 120 Pages of Black Lined Paper Perfect for Journaling, KDP Notebook Template – 6×9
Student Planner Journal 120 pages Ready to Upload PDF Commercial Use KDP Template 6×9" 8.5×11" for Low Content book
Recipe Journal Template – Editable Recipe Book Template, 120 Pages – Amazon KDP Interior