-
×
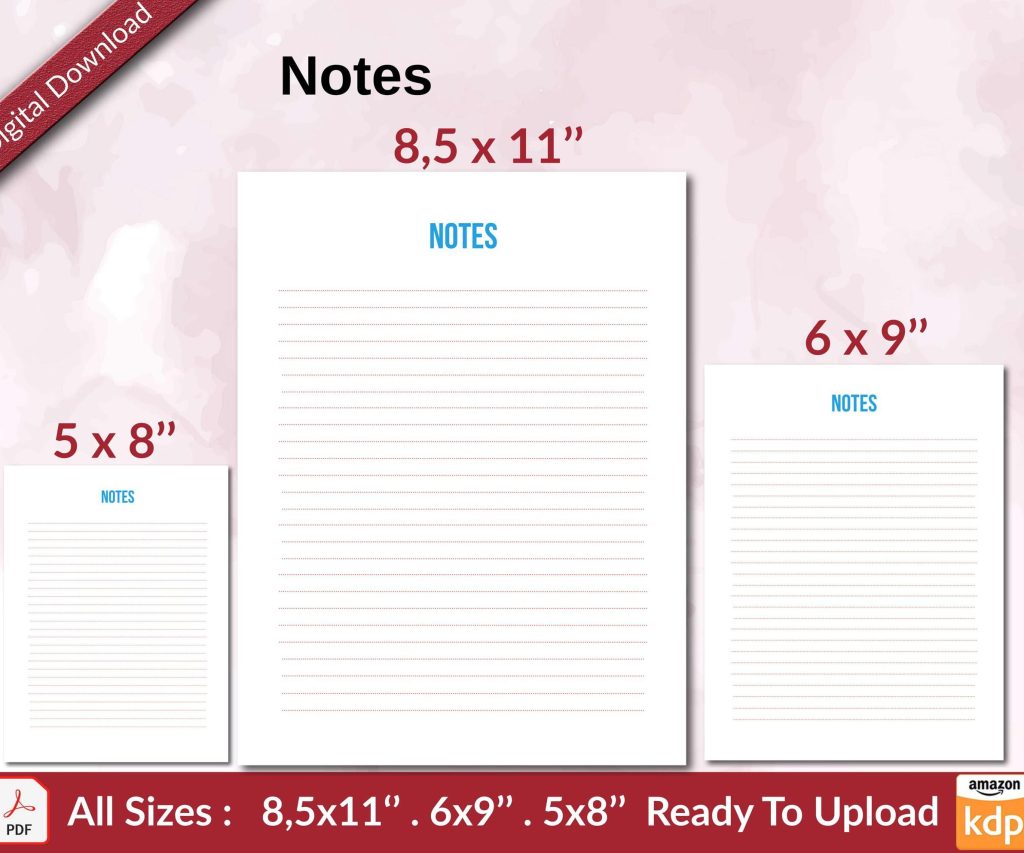 Notes KDP interior Ready To Upload, Sizes 8.5x11 6x9 5x8 inch PDF FILE Used as Amazon KDP Paperback Low Content Book, journal, Notebook, Planner, COMMERCIAL Use
1 × $0.00
Notes KDP interior Ready To Upload, Sizes 8.5x11 6x9 5x8 inch PDF FILE Used as Amazon KDP Paperback Low Content Book, journal, Notebook, Planner, COMMERCIAL Use
1 × $0.00
Subtotal: $0.00
Okay so I literally just helped someone with this yesterday and they were freaking out about margins, so let me walk you through the whole Google Docs book formatting thing because honestly it’s way simpler than people make it.
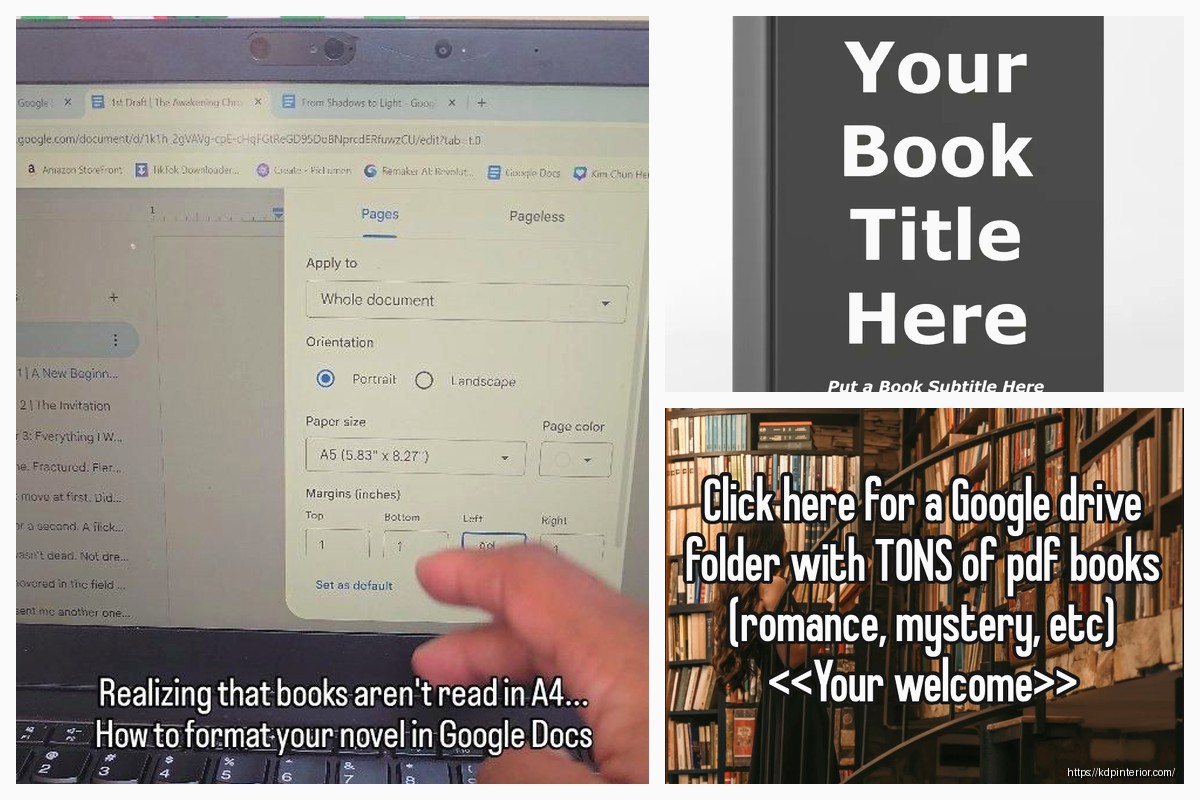
Right so you gotta start with page setup or you’ll be reformatting everything later which is annoying as hell. Go to File > Page Setup and this is where most people mess up because they leave it at the default letter size.
For KDP books the most common trim sizes are 6×9 inches for like regular books or 8.5×11 for workbooks and journals. Click on “Custom” under paper size and type in your dimensions. I usually do 6×9 for most of my books because it’s the sweet spot – looks professional, keeps printing costs reasonable.
Set your margins here too. For a 6×9 book I do:
The left margin is bigger because that’s where the binding goes and you don’t want text disappearing into the spine. Trust me on this one – I uploaded a book once with equal margins and the preview looked terrible, had to redo the whole thing.
This part trips people up but it’s actually not bad once you get it. Go to Insert > Headers & page numbers > Page numbers and choose where you want them. I like bottom center for fiction, top outer corners for non-fiction.
Here’s the thing though – your title page and copyright page shouldn’t have page numbers showing. So you gotta do this workaround:
Insert a section break after your front matter pages (Insert > Break > Section break). Then when you’re in the header/footer area of your actual content, there’s a little checkbox that says “Different first page” – uncheck that. But also look for “Link to previous” and turn that OFF. This lets you have different headers for different sections.
Wait I forgot to mention – if you want alternating headers like professional books have (book title on left pages, chapter title on right pages), Google Docs is gonna fight you on this. It’s honestly one area where Word is better, but you can sorta fake it by just putting your book title in the header and calling it a day. Most readers don’t even notice.
Double-click in the header area and you can format it however you want. I usually do a smaller font size (like 10pt when my body text is 11pt) and sometimes add a thin line underneath using borders. Keep it simple though – I see people getting crazy with headers and it just looks cluttered.
Okay so funny story – I used to think font choice was super important and spent hours agonizing over it. Then I realized most readers literally don’t care as long as it’s readable.
For body text stick with:
Font size should be 11pt or 12pt for body text. I do 11pt for 6×9 books because 12pt can look kinda large and eat up pages. For an 8.5×11 workbook definitely go with 12pt.
Line spacing is usually 1.15 or 1.5. Single spacing looks cramped, double spacing wastes paper and increases printing costs. I’m gonna be honest, I just use 1.15 for everything now and it works fine.
This is where it gets real – paragraph indents. You want first-line indents for fiction and most non-fiction. Highlight your text, go to Format > Align & indent > Indentation options, and set “Special indent” to “First line” at 0.3 inches.
BUT – and this is important – don’t indent:
You gotta manually fix these by putting your cursor there and dragging the indent marker back or just hitting Shift+Tab. Yeah it’s tedious. My cat jumped on my keyboard last week while I was doing this and messed up like 10 pages worth.
Don’t add extra space between paragraphs unless you’re doing a workbook or non-fiction with short sections. Fiction should just flow with indents, no extra spacing.
Make these consistent throughout your book. I use Heading 1 style for chapter titles – usually 18pt or 20pt, centered, with some space before it.
To add space before a heading, click on it and go to Format > Line & paragraph spacing > Add space before paragraph. I usually add like 72pt or 100pt so chapters start about a third down the page. Looks way more professional than starting right at the top.
You can get fancy with chapter headings by:
Just be consistent. If Chapter 1 has a certain style, Chapter 2 through whatever needs to match.
For scene breaks within chapters, don’t just hit Enter a bunch of times. Center a symbol like ### or *** on its own line with space above and below. Or just use extra white space – one blank line is usually enough.
Your book needs front matter before the actual content starts. This is like:
Title page should just have your book title and author name, centered and nicely spaced. I put the title about a third down the page, bigger font like 24pt or 28pt.
Copyright page goes on the back of the title page. Include copyright year, your name, “All rights reserved,” and maybe a line about no part being reproduced without permission. I also put my edition number here (First Edition, Second Edition, etc.).
If you need a TOC, use the built-in heading styles throughout your document. Then go to Insert > Table of contents and pick a style. Google Docs will auto-generate it based on your headings.
This is gonna sound weird but I always do this LAST after everything else is formatted, because if you change stuff later the page numbers get messed up and you gotta update it. Just right-click the TOC and hit “Update table of contents.”
Oh and another thing – if you’re adding images, size them properly BEFORE inserting. Go to Insert > Image and then click on the image to resize it by dragging corners.
For positioning, right-click the image and select “Wrap text” – I usually use “In line” for books because it keeps things from shifting around weirdly. Center your images unless they need to be aligned differently for design reasons.
Keep image resolution at 300 DPI for print. Lower than that and it’ll look pixelated. You can check this before inserting by looking at the image properties on your computer.
Don’t forget about back matter – this is stuff after your main content ends. Usually includes:
Format these pages the same as your front matter – keep them simple and clean. I always include a “Also by [Your Name]” page listing my other books because it drives cross-sales.
Here’s something I wish someone told me earlier – use Styles in Google Docs. When you format a heading or paragraph the way you want, click Format > Paragraph styles > Normal text (or whatever heading level) > Update to match.
Now every time you apply that style, it’ll look the same. Saves SO much time when you’re formatting a 200-page book and need everything consistent.
Before you export, scroll through the ENTIRE document checking for:
To fix orphans and widows, you can adjust spacing slightly or rewrite sentences. Yeah it’s annoying but it looks way better.
When you’re done, go to File > Download > PDF. Make sure “PDF” is selected, not “Microsoft Word” or anything else. KDP accepts both but PDF preserves your formatting exactly.
Wait I should mention – there’s also the option to download as EPUB for ebooks but honestly I use separate formatting for those. Print books and ebooks need different setups because of reflowable text and all that.
If your book has images or colored backgrounds that extend to the page edge, you need to account for bleed. KDP wants 0.125 inches of bleed on all sides. In Google Docs this is tricky because you can’t set bleed directly – you’d need to make your page size slightly larger to accommodate it.
For example, a 6×9 book with bleed would be set up as 6.25×9.25 inches in your page setup. Then extend your backgrounds or images to fill that extra space. Most low-content books don’t need this though, only if you’re doing full-color illustrated stuff.
Honestly for complex bleed setups I’d recommend using actual design software like Affinity Publisher or even Canva, but basic text-only books are totally fine in Google Docs.
After you format one book perfectly, save it as a template. Just clear out the content but keep all the styles, margins, headers, etc. Then for your next book, make a copy of that template and you’re already 90% done with formatting.
I have like five different templates now – 6×9 fiction, 6×9 non-fiction, 8.5×11 workbook, you get the idea. Saves me probably an hour per book at this point.
So yeah that’s basically it. Google Docs isn’t perfect for book formatting but it’s free and it works, which is all that matters when you’re starting out. Just take your time with the setup, be consistent, and check everything twice before uploading to KDP.
DISCOVER OUR FREE BEST SELLING PRODUCTS
Editable Canva Lined Journal: Express Your Thoughts – KDP Template
Lined Pages Journal 120 pages Ready to Upload PDF Commercial Use KDP Template 6×9 8.5×11 5×8 for Notebooks, Diaries, Low Content
Lined Pages Journal 120 pages Ready to Upload PDF Commercial Use KDP Template 6×9 8.5×11 5×8 for Notebooks, Diaries, Low Content
Cute Dogs Coloring Book for Kids | Activity Book | KDP Ready-To-Upload
Daily Planner Diary : Diary Planners for Everyday Productivity, 120 pages, 6×9 Size | Amazon KDP Interior
Wolf Coloring KDP interior For Adults, Used as Low Content Book, PDF Template Ready To Upload COMMERCIAL Use 8.5×11"
Coloring Animals Head Book for Kids, Perfect for ages 2-4, 4-8 | 8.5×11 PDF
Printable Blank Comic Book Pages PDF : Create Your Own Comics – 3 Available Sizes
Notes KDP interior Ready To Upload, Sizes 8.5×11 6×9 5×8 inch PDF FILE Used as Amazon KDP Paperback Low Content Book, journal, Notebook, Planner, COMMERCIAL Use
Black Lined Journal: 120 Pages of Black Lined Paper Perfect for Journaling, KDP Notebook Template – 6×9
Student Planner Journal 120 pages Ready to Upload PDF Commercial Use KDP Template 6×9" 8.5×11" for Low Content book
Recipe Journal Template – Editable Recipe Book Template, 120 Pages – Amazon KDP Interior