Okay so manuscript formatting is one of those things that seems way more complicated than it actually is, and I spent like my first year on KDP getting it wrong before someone finally showed me the actual standards that publishers expect.
The biggest thing you need to understand right away is that manuscript format is NOT the same as your final published book format. I see this mistake constantly and it drives me crazy because people spend hours making their manuscript look pretty with fancy fonts and graphics when literally no agent or publisher wants that. They want boring. They want standardized. They want to be able to read your work without getting distracted by your design choices.
The Basic Manuscript Template Setup
Start with a blank Word document or Google Doc. Here’s what you need:
- 12-point Times New Roman or Courier font (yes really, these “old” fonts are still standard)
- Double-spacing throughout the ENTIRE manuscript
- 1-inch margins on all sides
- Left-aligned text only (no justified text even though it looks nicer)
- Indent each new paragraph by 0.5 inches
- One space after periods, not two
I know that sounds ridiculously simple but that’s literally it for the basic setup. Last month I had someone show me their manuscript and they’d used like four different fonts because they thought it would show their “creativity” and yeah… no agent is gonna respond well to that.
The Header Situation
Your header goes on every page except the title page. Top right corner, you need:
Your Last Name / BOOK TITLE (abbreviated if it’s long) / Page Number
So mine would look like: Harper / MIDNIGHT SONS / 1
The page number should auto-increment obviously. In Word you set this up through Insert > Header and then Insert > Page Number. Takes like thirty seconds once you know where to click.
Oh and another thing – some people put their contact info in the header too but honestly that’s old school. Your contact info goes on the title page and that’s enough.
Title Page Format
Top left corner, single-spaced:
- Your legal name
- Street address
- City, State ZIP
- Phone number
- Email address
Center of the page (like literally centered vertically and horizontally):
- Book title in ALL CAPS
- by
- Your Name (or pen name)
Bottom right corner:
- Word count (rounded to nearest thousand)
- Genre
- Copyright year and your name
I forgot to mention – if you have an agent, their contact info goes where your contact info would go, and yours moves to below the word count. But if you’re submitting directly to publishers or just prepping your manuscript for KDP conversion, use your info.
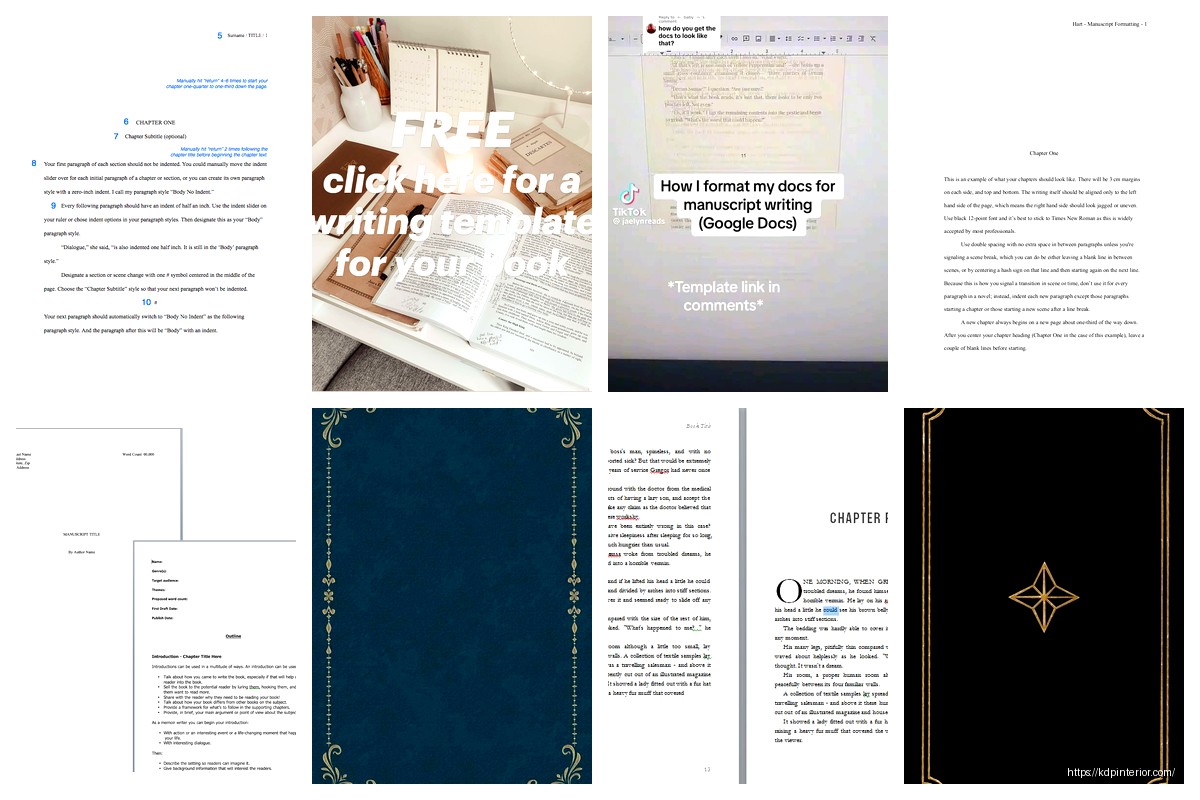
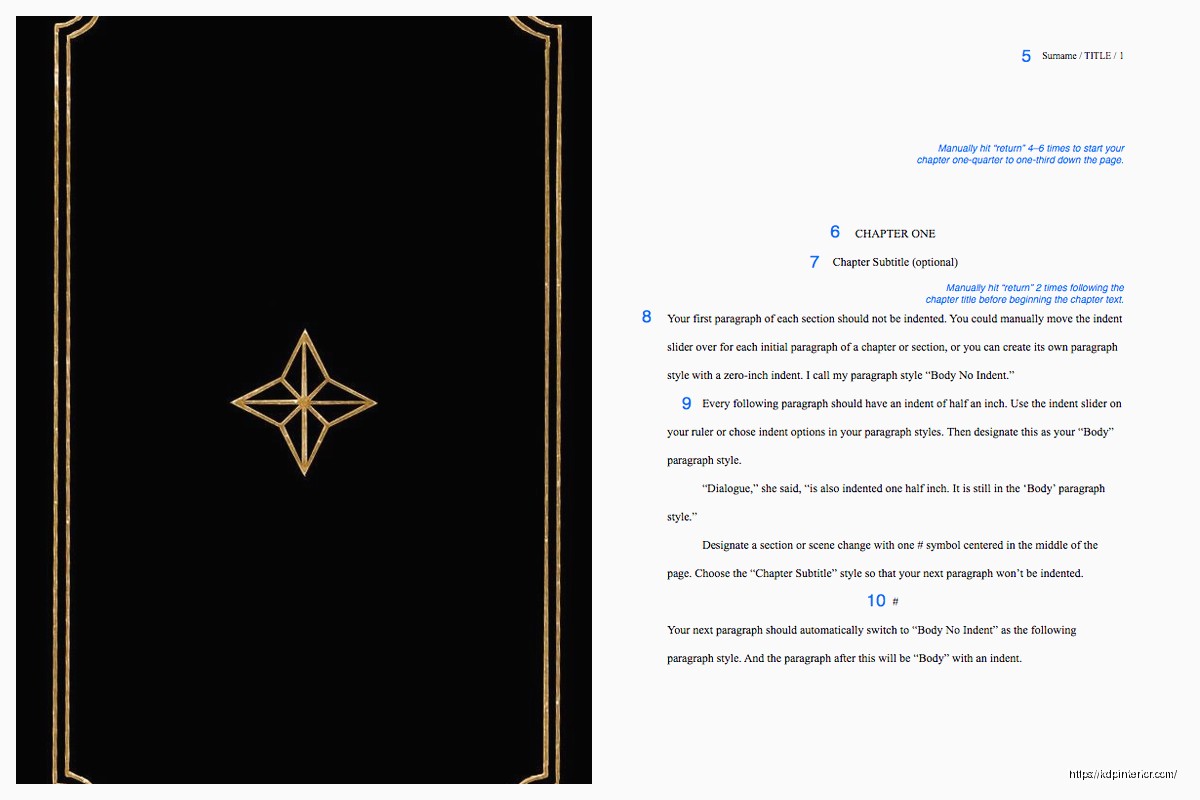
Chapter Headings and Breaks
This is gonna sound weird but don’t get fancy with chapter headings. Start each chapter about 1/3 down the page (hit return like 6-8 times). Type “Chapter One” or “Chapter 1” – either is fine just be consistent. Center it. Then drop down 2-4 lines and start your chapter text.
For scene breaks within a chapter, just use a single pound sign (#) centered on its own line with a blank line above and below. That’s it. Don’t use asterisks, don’t use fancy symbols, definitely don’t use graphics or decorative elements.
I tested this with a client last week who had these elaborate scene break designs and when we converted to ebook format it completely broke the file. The simple # symbol converts cleanly every single time.
Formatting Dialogue and Special Text
Italics are fine for emphasis, thoughts, or foreign words. Just use actual italic formatting, don’t underline to indicate italics (that’s a typewriter-era thing). Bold is generally not used in manuscript format except maybe for chapter headings if you want.
For dialogue, standard quotation marks. Each new speaker gets a new paragraph. If someone’s talking for multiple paragraphs, you open with a quotation mark at the start of each paragraph but only close the quote at the very end of their speech.
Em dashes for interruptions – just use two hyphens — and most publishers will convert them properly. Or if your software does auto-formatting, let it create the actual em dash (—).
Front Matter Nobody Tells You About
Before Chapter One, you might need:
- Half-title page (just the title, centered)
- Title page (the full one I described earlier)
- Copyright page
- Dedication page (optional)
- Acknowledgments (optional, can also go in back)
- Table of Contents (depends on genre)
For submission to agents/publishers, honestly you can skip most of this and just include the title page. They care about the manuscript itself. For KDP publishing, you’ll want all these elements but you’ll format them for the final book, not manuscript format.
Wait I forgot to mention – if you’re writing nonfiction, you also need to include a table of contents in your submission package. Fiction generally doesn’t unless it’s a short story collection or anthology.
The Word Count Thing
Put your word count on the title page rounded to the nearest thousand. A 47,382-word novel becomes “approximately 47,000 words” on your title page.
Don’t try to inflate your count by messing with margins or spacing. Agents and publishers know the standard word count for a 250-page manuscript in proper format (it’s about 62,500 words). If your page count doesn’t match up, they’ll know you tried to game the system.
File Naming and Submission
Save your file as: TITLE_AuthorLastName.docx (or .doc if they specifically request it, though that’s rare now)
So mine would be: MIDNIGHTSONS_Harper.docx
Don’t use spaces in the filename, use underscores or hyphens. Don’t include version numbers in the submitted filename. Don’t use “final” or “revised” or anything like that. Keep it clean.
Common Mistakes That Make You Look Amateur
Okay so funny story, I once received a manuscript to review that had:
- Comic Sans font (I’m not kidding)
- Centered text for entire paragraphs
- Colored text for different characters
- Clipart at chapter breaks
- Single spacing
The writer was genuinely confused when I explained this wouldn’t work. They thought they were making it “easier to read” and “more engaging.” But here’s the thing – manuscript format exists to REMOVE all distractions so the agent or publisher can focus purely on your words.
Other mistakes I see constantly:
- Using justified alignment instead of left-aligned (creates weird spacing)
- Adding extra space between paragraphs (it’s double-spaced already, you don’t need this)
- Not indenting the first paragraph after a chapter break (you should indent ALL paragraphs including the first one in a new chapter)
- Using tabs instead of setting a first-line indent (tabs can mess up when files convert)
- Including a header/footer on the title page (no headers on page one)
Setting Up Your Template in Word
Do this once and save it as a template so you never have to think about it again:
Open Word. Set your font to 12pt Times New Roman. Go to Format > Paragraph and set:
- Line spacing: Double
- Alignment: Left
- Special: First line indent 0.5″
- Before/After spacing: 0
Then Page Layout > Margins > set all to 1 inch.
Save this as a template file (.dotx) called “Manuscript Template” or whatever. Now every time you start a new project, open this template and you’re already formatted correctly.
My cat just knocked over my coffee which is perfect timing because I need a break anyway… but yeah, where was I.
Nonfiction Manuscript Differences
If you’re doing nonfiction, couple things change:
You definitely need a table of contents in your submission package. You might also need an outline, sample chapters (usually 2-3), and a book proposal before anyone wants to see the full manuscript. The formatting stays the same though.
For reference materials, textbooks, or heavily formatted nonfiction, you might need to include notes about where images, charts, or tables should go. Just add [INSERT FIGURE 1 HERE] or whatever in brackets where the element belongs, and include the actual figures as separate files.
The PDF Question
Never submit a PDF unless explicitly requested. Word .docx is standard. Publishers need to be able to edit, and PDFs make that difficult. Some submission systems will convert your .docx to PDF automatically on their end, but you should upload the editable version.
Exception: If you’re submitting to KDP directly for publishing (not to traditional publishers), you can use PDF, but honestly the .docx upload usually works better because KDP’s conversion is pretty good now.
Specific Genre Considerations
Poetry manuscripts are completely different – usually single-spaced, one poem per page, and a whole different set of formatting rules. If you’re doing poetry, honestly you need a different guide because it’s its own beast.
Screenplays also have their own format (Courier 12pt, specific margin settings, scene headers in caps). Use actual screenwriting software like Final Draft or the free alternatives.
But for standard fiction and most nonfiction, what I’ve laid out here is the industry standard and has been for like decades.
What About After Acceptance
Once a publisher accepts your work, they’ll have their own style guide and formatting requirements for the final manuscript. You’ll probably need to reformat everything to match their house style. That’s fine and normal. The submission format is just to get your foot in the door.
For KDP self-publishing, you’ll convert this manuscript format into your actual book format using either KDP’s tools or software like Vellum or Atticus. The manuscript format is your source document, your clean working copy. You’ll create the formatted versions from this.
I gotta say, having a clean manuscript in standard format has saved me so much time over the years. When I need to create a new edition or fix something, I go back to the manuscript file and work from there. It’s your master document.
Look, I know this seems overly strict and kinda boring, but there’s a reason the industry standardized on this format. It’s easy to read on screen or printed, it’s easy to estimate page count and production costs from, and it removes all the visual noise so your writing can speak for itself. Once you set up your template, you literally never have to think about it again. Just write in the template and you’re already submission-ready.
 Lined Pages Journal 120 pages Ready to Upload PDF Commercial Use KDP Template 6x9 8.5x11 5x8 for Notebooks, Diaries, Low Content
1 × $0.00
Lined Pages Journal 120 pages Ready to Upload PDF Commercial Use KDP Template 6x9 8.5x11 5x8 for Notebooks, Diaries, Low Content
1 × $0.00 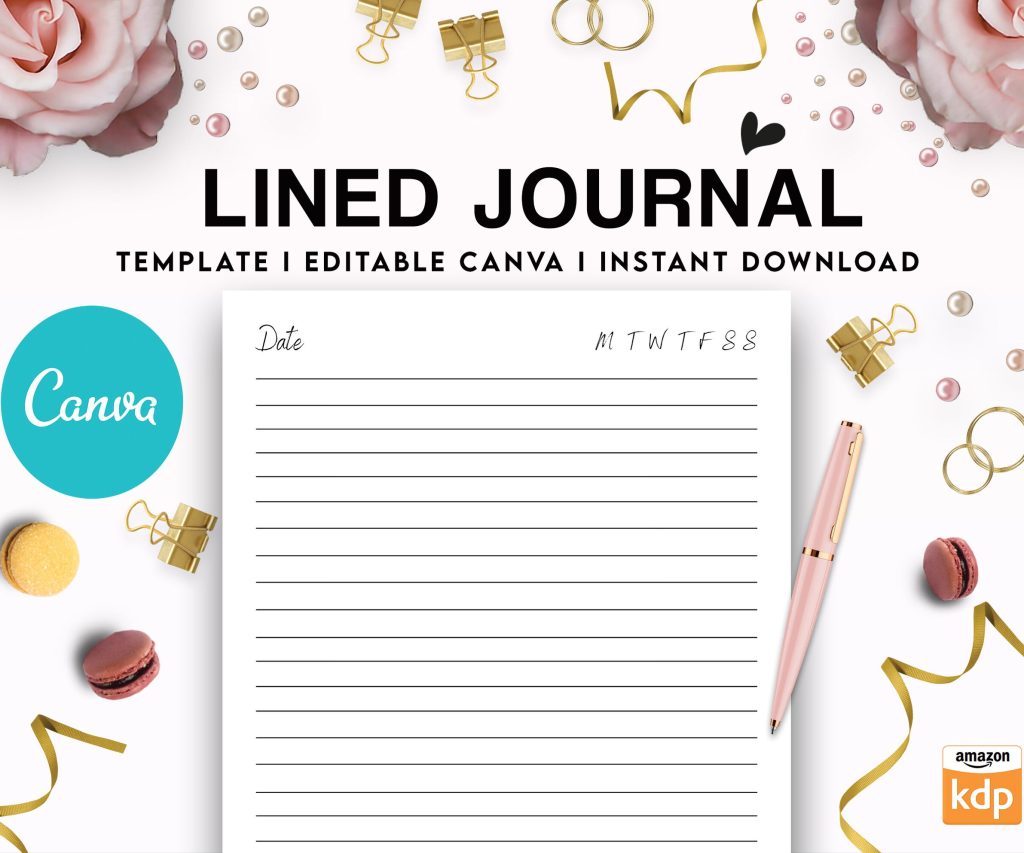 Editable Canva Lined Journal: Express Your Thoughts - KDP Template
1 × $0.00
Editable Canva Lined Journal: Express Your Thoughts - KDP Template
1 × $0.00 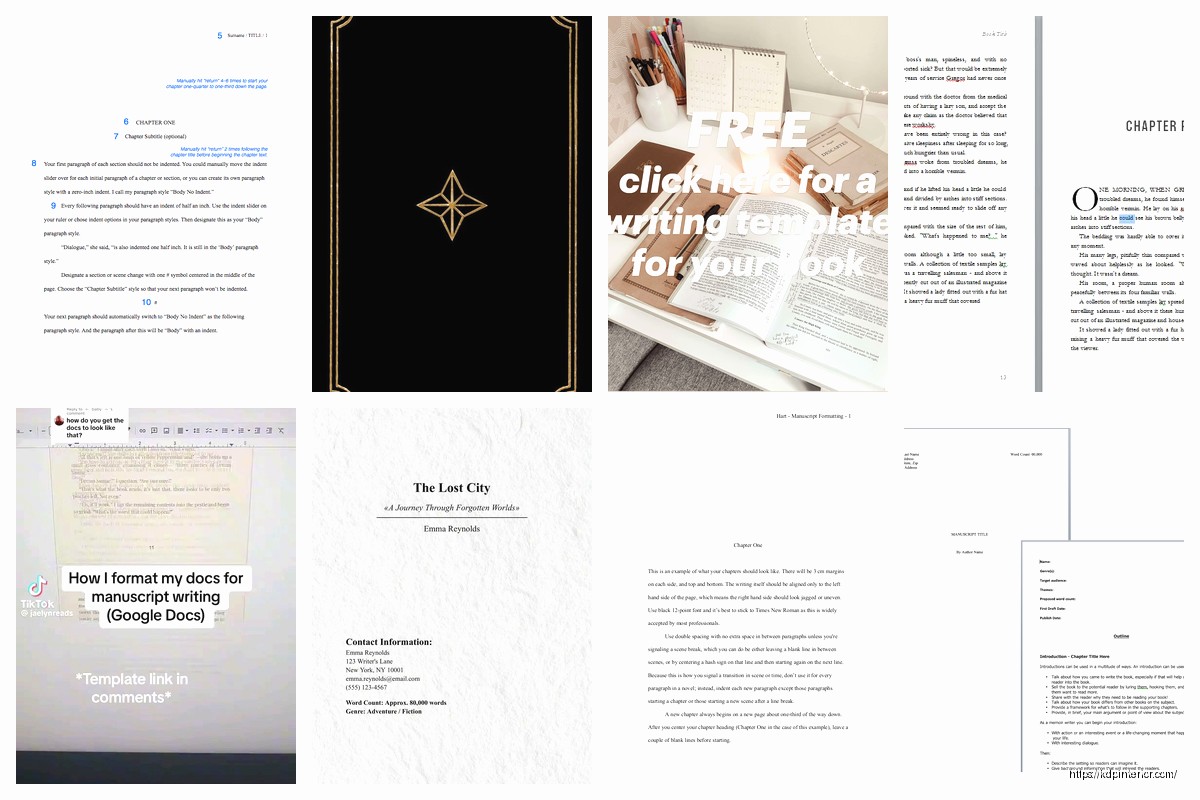
DISCOVER OUR FREE BEST SELLING PRODUCTS
Editable Canva Lined Journal: Express Your Thoughts – KDP Template
Lined Pages Journal 120 pages Ready to Upload PDF Commercial Use KDP Template 6×9 8.5×11 5×8 for Notebooks, Diaries, Low Content
Lined Pages Journal 120 pages Ready to Upload PDF Commercial Use KDP Template 6×9 8.5×11 5×8 for Notebooks, Diaries, Low Content
Cute Dogs Coloring Book for Kids | Activity Book | KDP Ready-To-Upload
Daily Planner Diary : Diary Planners for Everyday Productivity, 120 pages, 6×9 Size | Amazon KDP Interior
Wolf Coloring KDP interior For Adults, Used as Low Content Book, PDF Template Ready To Upload COMMERCIAL Use 8.5×11"
Coloring Animals Head Book for Kids, Perfect for ages 2-4, 4-8 | 8.5×11 PDF
Printable Blank Comic Book Pages PDF : Create Your Own Comics – 3 Available Sizes
Notes KDP interior Ready To Upload, Sizes 8.5×11 6×9 5×8 inch PDF FILE Used as Amazon KDP Paperback Low Content Book, journal, Notebook, Planner, COMMERCIAL Use
Black Lined Journal: 120 Pages of Black Lined Paper Perfect for Journaling, KDP Notebook Template – 6×9
Student Planner Journal 120 pages Ready to Upload PDF Commercial Use KDP Template 6×9" 8.5×11" for Low Content book
Recipe Journal Template – Editable Recipe Book Template, 120 Pages – Amazon KDP Interior