-
×
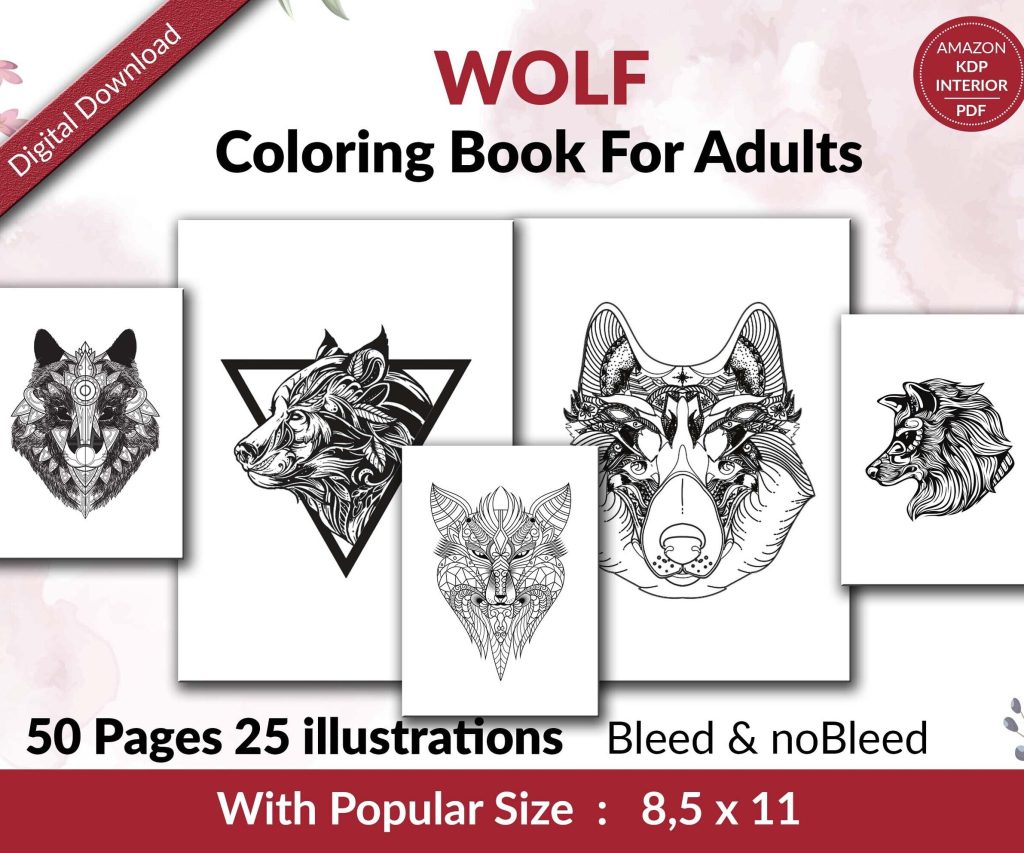 Wolf Coloring KDP interior For Adults, Used as Low Content Book, PDF Template Ready To Upload COMMERCIAL Use 8.5x11"
1 × $0.00
Wolf Coloring KDP interior For Adults, Used as Low Content Book, PDF Template Ready To Upload COMMERCIAL Use 8.5x11"
1 × $0.00
Subtotal: $0.00
Okay so the whole KDP book size thing used to drive me absolutely nuts until I just made a spreadsheet and tested like 30 different formats over a weekend. My cat kept walking across the keyboard but whatever, got it done.
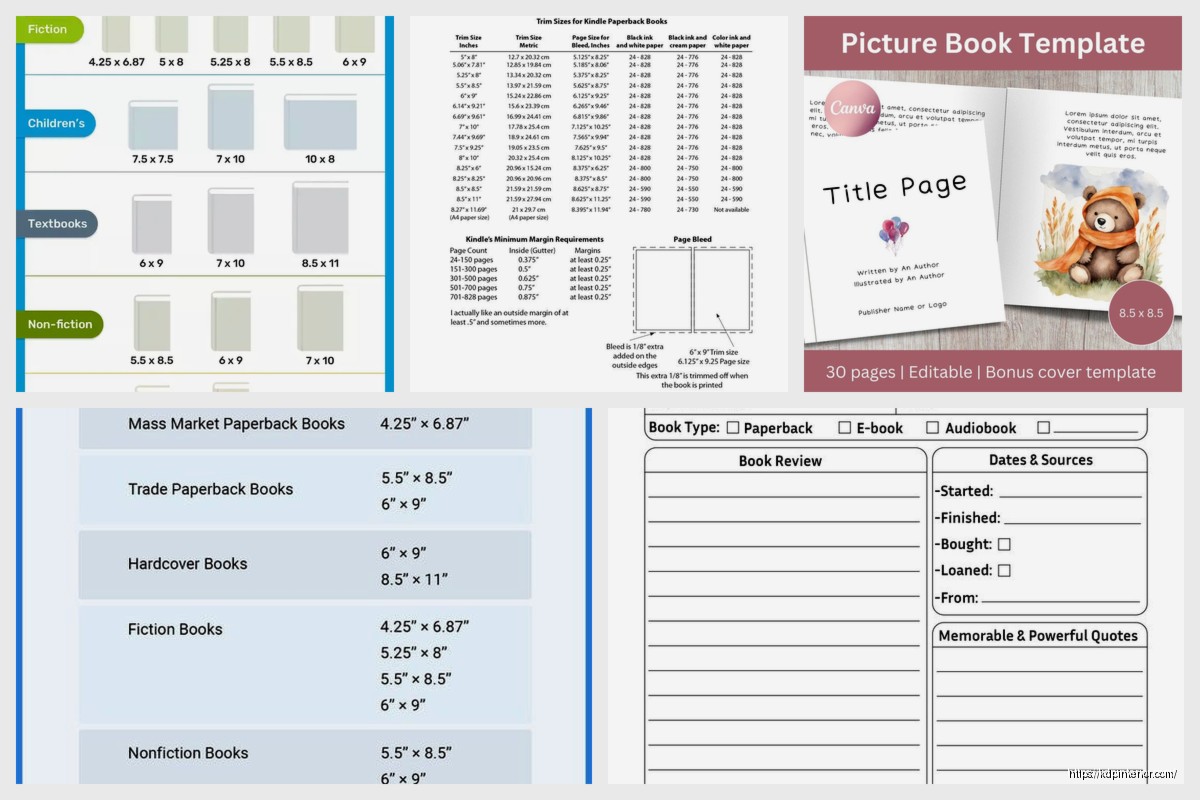
Look, Amazon gives you like 40+ trim size options but realistically you’re gonna use maybe five of them. Here’s what I’ve published the most:
6 x 9 inches – this is your bread and butter for basically everything. Non-fiction, journals, planners, workbooks. I’ve done probably 120 books in this size and it just works. The margins are forgiving and it looks professional on anyone’s shelf.
8.5 x 11 inches – when you need full-page stuff. Coloring books, activity books, some workbooks where people actually need space to write. Takes more ink so your royalties get dinged a bit but sometimes you gotta do what you gotta do.
5 x 8 inches – smaller novels or pocket-sized journals. I did a series of gratitude journals in this size last year and they sold better than the 6 x 9 versions because people liked carrying them around. Go figure.
8 x 10 inches – the compromise size. Good for cookbooks or photo-heavy stuff where 8.5 x 11 feels too textbook-y but 6 x 9 is too cramped.
5.5 x 8.5 inches – honestly I don’t use this much but it’s popular for fiction. Kinda standard paperback novel size.
Okay so here’s where everyone screws up including me for like my first 20 books. You can’t just set your Word doc or whatever to 6 x 9 and call it a day. You need bleeds and margins and Amazon is weirdly specific about this.
Bleeds are that extra 0.125 inches on all sides where your background color or images extend past the trim line. So if you’re doing a 6 x 9 book with bleed, your actual document size is 6.25 x 9.25 inches. If you’re not using bleed – like if your pages are just white with black text – then you can skip this and just do 6 x 9 exactly.
I learned this the hard way when my first coloring book came back with white strips along the edges because I didn’t extend the borders properly. Had to redo the whole thing.
Amazon’s minimum margins depend on your page count which is annoying but makes sense when you think about how binding works. The thicker your book, the more gets lost in the gutter (that’s the middle part where pages meet).
For books under 150 pages:
For 151-300 pages, bump that inside margin to 0.5 inches. For 301-500 pages, go to 0.625 inches. Over 500 pages you need 0.75 inches and honestly at that point just make it 0.875 to be safe.
I usually just set my inside margin to 0.75 inches on everything now because I got tired of doing math. Your content area is a bit smaller but nobody’s ever complained.
Wait I should just list these out properly. These are the trim sizes Amazon accepts for paperback:
There’s more but those are the main ones. For hardcover you get fewer options – basically just 6 x 9, 7 x 10, and 8.5 x 11 in the standard sizes.
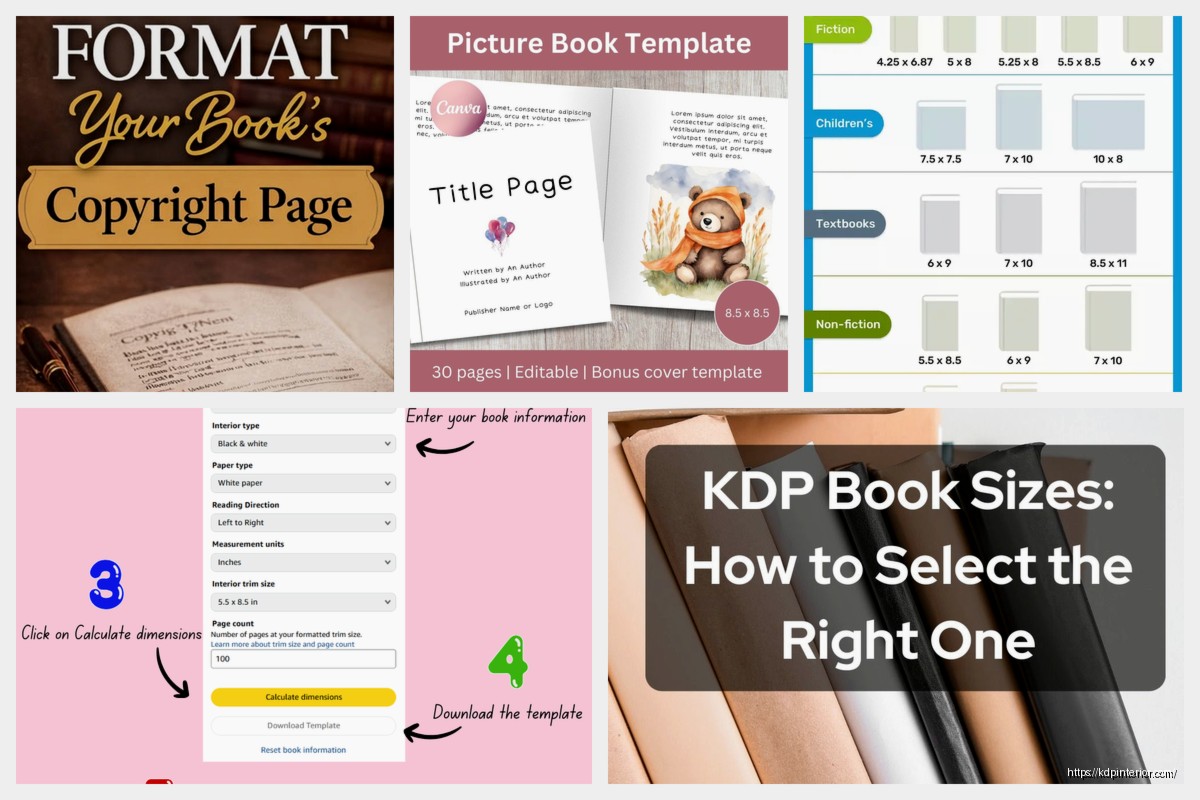
I use a mix of tools depending on the project and I’m gonna walk through the basic setup for each.
Go to Layout > Size > More Paper Sizes. Plug in your dimensions. If you need bleed add 0.25 inches total (0.125 on each side) to both width and height.
Then hit Layout > Margins > Custom Margins and set your gutter and margins. Make sure “Mirror margins” is checked if you want different inside/outside margins which you probably do.
Oh and another thing – set your document to start page numbers on page 1 being a right-hand page. Your title page should always be on the right. Amazon’s picky about this for some reason.
Honestly Google Docs kinda sucks for KDP formatting. You can set custom page sizes under File > Page Setup but it doesn’t handle gutters well and you can’t do bleed properly. I only use it for super basic text-only books now.
This is gonna sound weird but I do like 60% of my low-content books in Canva now. Create custom dimensions, set up your margins with guides, and export as PDF. For a 6 x 9 with bleed I make it 6.25 x 9.25 inches, then drag guide lines in at 0.125 inches from each edge to mark my trim line.
The trick is making sure you export at 300 DPI. Canva defaults to lower resolution sometimes and Amazon will reject it.
If you’re doing anything complex just use InDesign honestly. Set up your document with the trim size, check “facing pages,” add your bleed (0.125 in), set your margins. It calculates everything properly and the PDF export settings are already optimized for print.
I watched The Office for the millionth time while learning InDesign and now I can’t use it without thinking about that show.
This matters more than you’d think. Black and white interiors need to be grayscale or straight black. If you’ve got RGB colors in there Amazon converts them and they look muddy.

For color interiors, use CMYK color mode if your software supports it. RGB usually works but CMYK is what actually prints so you get more accurate colors. I learned this after my first coloring book came out with colors that looked nothing like my screen.
File size limits are different too. Black and white PDFs can be up to 650 MB but honestly if you’re hitting that something’s wrong. Color interiors max out at 650 MB too but you’ll hit it way faster with full-page images.
Your book needs to be at least 24 pages. Maximum is 828 pages for black and white, only 550 for color. These include blank pages so if you’ve got a 200-page book with content, you still gotta count the blank pages at the end to make it even.
Speaking of which – your page count must be divisible by 2. Seems obvious but I’ve seen people try to upload 127-page PDFs. Doesn’t work.
Oh wait I forgot to mention – the page count affects your spine width which affects your cover template. Amazon has a calculator for this but basically every 100 pages adds about 0.2 inches to your spine width depending on paper type. White paper is thicker than cream.
Your cover is one continuous image that wraps around the book. Amazon provides templates but the formula is:
Cover width = (2 x trim width) + spine width + (2 x bleed)
Cover height = trim height + (2 x bleed)
So for a 200-page 6 x 9 book on white paper with a spine of about 0.44 inches:
Width = (2 x 6) + 0.44 + 0.25 = 12.69 inches
Height = 9 + 0.25 = 9.25 inches
Just use Amazon’s cover calculator honestly. I tried doing it manually once and got the spine off by like 0.1 inches. It matters.
You get two paper options – white and cream. White is brighter, better for color or images. Cream is easier on the eyes for text-heavy books and gives that classic novel feel.
Cream paper is slightly thicker so your spine width increases a tiny bit. The cover calculator accounts for this but if you’re designing your cover separately make sure you select the right paper type first.
I use white for everything except fiction because readers expect cream for novels. It’s just a thing.
Not adding bleed when they need it. If your pages have any background color or images that go to the edge, you need bleed. Otherwise you’ll get white strips when the trimming is slightly off.
Using RGB instead of grayscale for black and white interiors. Amazon converts it but it adds processing time and sometimes looks worse.
Making margins too small. Amazon will reject it or your text gets lost in the binding. Just use the minimums I listed earlier.
Forgetting about the gutter. That inside margin needs to be bigger than the outside or your text disappears into the spine.
Not checking their PDF before uploading. Use the preview tool in Adobe or whatever. I’ve caught so many formatting issues this way.
6 x 9 with bleed: 6.25 x 9.25 inches, 0.75″ inside margin, 0.25″ other margins
8.5 x 11 with bleed: 8.75 x 11.25 inches, 0.5″ all margins (I go symmetrical on this size)
5 x 8 with bleed: 5.25 x 8.25 inches, 0.625″ inside margin, 0.25″ other margins
These have never gotten rejected and they leave enough white space to look professional.
Hardcover specs are mostly the same but your margins need to be bigger. Minimum 0.5 inches on all sides regardless of page count, and I usually do 0.75 inches inside margin to be safe.
The cover template includes the case laminate (the actual hard cover) which extends beyond your trim size. Amazon’s template generator handles this automatically so just use that instead of calculating it yourself.
Hardcovers also cost more to print obviously so your royalty calculations change. But that’s a whole other thing.
Order a proof copy. Seriously just do it. It costs like $5 and you’ll catch issues you never saw on screen. I’ve found margin problems, color issues, all kinds of stuff that looked fine digitally.
Check the spine alignment on your proof. Sometimes the spine is slightly off-center and your text or logo looks crooked. This usually means your spine width calculation was wrong.
Look at the gutter. Open the book flat and make sure text isn’t disappearing. If it is, increase your inside margin and reupload.
Alright that’s basically everything I wish someone had told me when I started. The templates seem complicated but once you’ve set up one properly you can reuse it forever. I’ve got like 15 templates saved now for different sizes and project types and I just duplicate them whenever I start something new. Way easier than figuring it out every single time.
DISCOVER OUR FREE BEST SELLING PRODUCTS
Editable Canva Lined Journal: Express Your Thoughts – KDP Template
Lined Pages Journal 120 pages Ready to Upload PDF Commercial Use KDP Template 6×9 8.5×11 5×8 for Notebooks, Diaries, Low Content
Lined Pages Journal 120 pages Ready to Upload PDF Commercial Use KDP Template 6×9 8.5×11 5×8 for Notebooks, Diaries, Low Content
Cute Dogs Coloring Book for Kids | Activity Book | KDP Ready-To-Upload
Daily Planner Diary : Diary Planners for Everyday Productivity, 120 pages, 6×9 Size | Amazon KDP Interior
Wolf Coloring KDP interior For Adults, Used as Low Content Book, PDF Template Ready To Upload COMMERCIAL Use 8.5×11"
Coloring Animals Head Book for Kids, Perfect for ages 2-4, 4-8 | 8.5×11 PDF
Printable Blank Comic Book Pages PDF : Create Your Own Comics – 3 Available Sizes
Notes KDP interior Ready To Upload, Sizes 8.5×11 6×9 5×8 inch PDF FILE Used as Amazon KDP Paperback Low Content Book, journal, Notebook, Planner, COMMERCIAL Use
Black Lined Journal: 120 Pages of Black Lined Paper Perfect for Journaling, KDP Notebook Template – 6×9
Student Planner Journal 120 pages Ready to Upload PDF Commercial Use KDP Template 6×9" 8.5×11" for Low Content book
Recipe Journal Template – Editable Recipe Book Template, 120 Pages – Amazon KDP Interior