Amazon KDP guide, KDP book publishing
Make Your Own Cookbook Template: Custom Recipe Books
Mar
Okay so I just helped a client launch their family cookbook last week and the whole template thing is actually way simpler than people make it out to be, you just gotta know which route you’re taking before you start throwing recipes into random pages.
Pick Your Format First Because Everything Else Depends On It
Look, I wasted like three days once building templates in the wrong size because I didn’t decide if I was doing a 6×9 or 8×10 book. Total mess. For cookbooks, you’re probably gonna want either 8×10 or 8.5×11 because recipe pages need room for ingredients lists and those step photos everyone expects now. The 6×9 size works if you’re doing a minimal text-only thing, but honestly? Most people expect bigger for cookbooks.
Amazon KDP lets you do these trim sizes for paperback:
- 6×9 (feels too cramped for most recipe layouts)
- 7×10 (decent middle ground)
- 8×10 (my go-to for cookbooks)
- 8.5×11 (great if you want that spiral-bound cookbook vibe even though KDP doesn’t do spiral)
The bleed settings matter too – you want 0.125 inches on all sides if you’re using background colors or images that go to the edge. I usually just set up my templates with bleed from the start even if I’m not sure I’ll use it because going back to add it later is annoying.
The Software Situation
So there’s like five ways to actually build your template and they’re all kinda annoying in different ways. I’ve used all of them at different points depending on what the project needed.
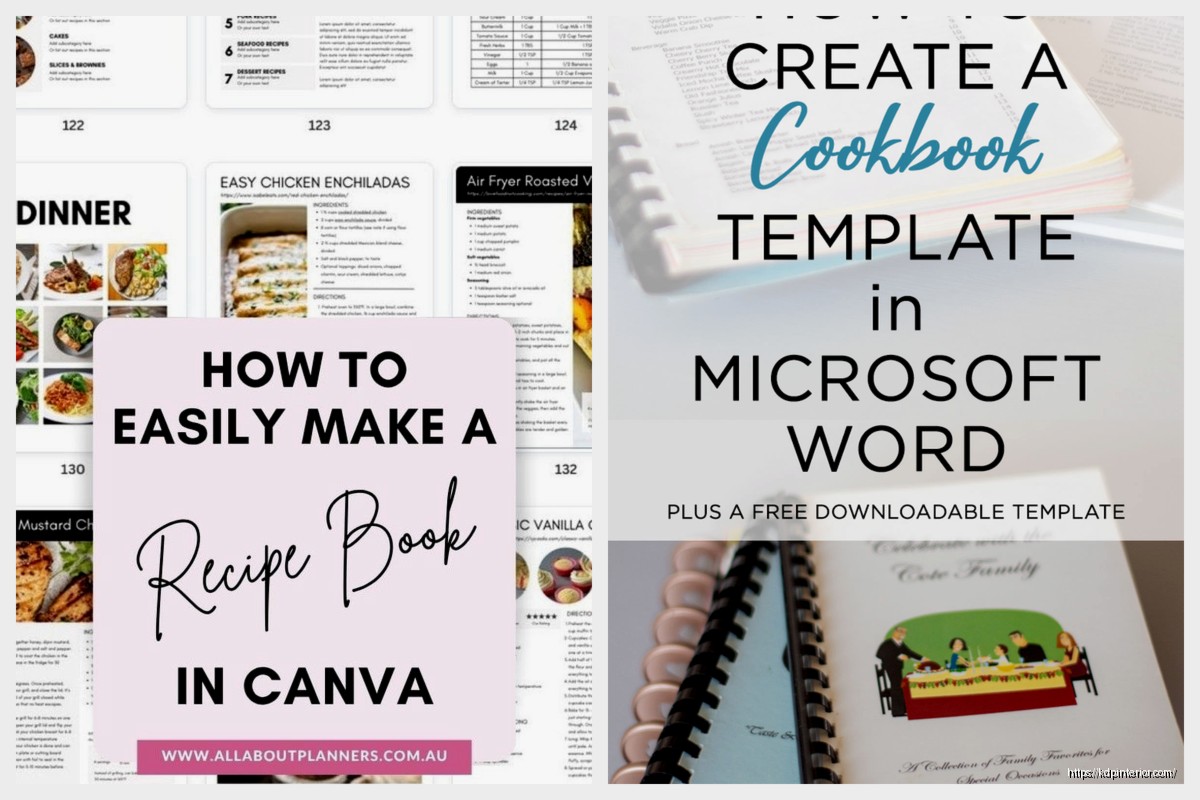
Canva (The Easy Route)
Canva’s got cookbook templates already built in, which sounds great until you realize half of them are sized wrong for KDP or they’ve got elements you can’t fully customize. But here’s the thing – if you’re just starting out and the idea of InDesign makes you wanna run away, Canva works fine.
I set up a template there for a client who was doing a church fundraiser cookbook and we knocked it out in like two days. You just gotta make sure you’re setting up custom dimensions – go to Custom Size and punch in your trim size PLUS the bleed. So for an 8×10 with bleed, you’re actually creating pages at 8.25 x 10.25.
The trick with Canva is creating your master pages. Make one page that has all your standard elements – page numbers, headers, the recipe card layout – then duplicate it like 50 times before you start filling in actual content. Way faster than rebuilding the layout every single time.
Microsoft Word (Hear Me Out)
Everyone thinks Word is just for boring documents but I’ve published probably 30 cookbooks that started in Word. It’s not sexy but it works and you probably already have it.
Set your page size under Layout > Size > More Paper Sizes. Put in your dimensions. Set your margins to at least 0.5 inches on the outside edges and 0.75 on the inside (the gutter) because nobody wants text disappearing into the spine.
The main problem with Word is that moving images around makes you wanna throw your laptop sometimes. Everything shifts weird. My workaround is using text boxes for literally everything – ingredients go in one text box, instructions in another, images in their own box. Lock the text boxes in place so they stop jumping around when you add content.
oh and another thing – use styles in Word. Create a style for recipe titles, one for ingredients, one for instructions. Saves so much time and keeps everything consistent when you’ve got 50+ recipes.
InDesign (If You’re Serious)
This is what I use now for client work because once you learn it, nothing else compares. The learning curve is steep though, not gonna lie. I spent like two months just fumbling around before things clicked.
InDesign lets you set up master pages that automatically apply to new pages. So your header, footer, page numbers – all that repetitive stuff – gets handled automatically. You create your recipe layout once on a master page, then every time you apply that master to a new page, boom, the layout’s already there.
My basic cookbook master page setup usually includes:
- Text frame for recipe title at the top
- Two-column text frame – left column for ingredients, right column for instructions
- Image placeholder (usually top right or full width above the columns)
- Footer with page numbers and maybe the book title
The subscription cost is like $20-something a month which used to annoy me but honestly if you’re doing more than one cookbook or planning to keep publishing, it pays for itself fast.
Actually Building Your Template Layout
Okay so once you’ve picked your software, you need to figure out what actually goes on these pages. I’ve tested a bunch of different layouts and here’s what actually works based on how people use cookbooks in real kitchens.
The One Recipe Per Page Layout
This is the cleanest and honestly my favorite for books with like 40-80 recipes. Each recipe gets a full page, makes everything easy to read when the book’s propped up on the counter and you’ve got flour all over your hands.
Standard elements I include:
- Recipe name as a header (I use 24-28pt font, something readable)
- Small line with prep time, cook time, servings (people actually use this stuff)
- Ingredients list on the left or top – with checkbox bullets so people can check off as they go
- Instructions numbered clearly
- Space for a photo – doesn’t have to be huge, 3×4 inches works fine
- Optional: a small section for notes at the bottom
My cat just knocked over my coffee while I’m writing this, great.
Anyway, the one-per-page layout means your cookbook will be longer but people actually prefer this because they’re not flipping back and forth trying to find where the recipe continues.
The Two Recipe Per Page Layout
This works better for simpler recipes – like a cocktail book I did last year or a collection of smoothie recipes. If your recipes are short (like 5-6 ingredients, 3-4 steps), you can fit two on a page without it feeling cramped.
Just divide your page horizontally – top recipe and bottom recipe. Keep the same structure for both so it doesn’t look chaotic.
The Spread Layout
This is when you design across two pages that face each other. Left page has a big beautiful photo of the finished dish, right page has the recipe. Looks AMAZING but it’s tricky because you gotta think about the gutter (where the pages meet in the middle).
I only do spread layouts for premium cookbooks or when someone’s willing to spend extra time on design. The problem is if someone’s using the ebook version, the spreads don’t work the same way so you’re kinda designing two different versions.
The Front Matter Nobody Thinks About Until It’s Too Late
Okay so you can’t just start your cookbook with Recipe #1 on page one. You need front matter and I’ve seen people forget this until they’re about to upload to KDP.
Standard front matter for cookbooks:
- Title page (just the cookbook title and your name)
- Copyright page (the boring legal stuff – I have a template I just copy-paste and change the year)
- Table of contents (yes you gotta make this, people actually use it)
- Optional: Introduction or “How to Use This Cookbook” page
- Optional: Measurement conversion chart (people love these)
- Optional: Dedication page if you’re into that
That’s usually 4-8 pages before your first recipe even shows up. Plan for this when you’re figuring out page counts.
Table of Contents Strategy
Here’s something I learned after publishing like 15 cookbooks – organize your TOC by category, not alphabetically. Nobody wants to flip through an alphabetical list when they’re trying to find a dessert recipe.
Categories I usually use:
- Breakfast & Brunch
- Appetizers & Snacks
- Main Dishes (sometimes split into Chicken, Beef, Seafood, Vegetarian)
- Sides & Salads
- Desserts
- Drinks
And then within each category, list the recipes with page numbers. Make sure those page numbers are actually correct – I use automatic page numbering in InDesign so if I move stuff around it updates automatically, but if you’re in Word or Canva you gotta check manually.
Design Elements That Actually Matter
wait I forgot to mention – fonts are weirdly important in cookbooks and most people pick terrible ones.
Font Choices
You need two fonts max, maybe three if you really know what you’re doing. I typically use:
- A clean serif or sans-serif for recipe titles (Montserrat, Playfair Display, Georgia – something with personality but still readable)
- A simple sans-serif for body text and ingredients/instructions (Open Sans, Lato, Helvetica – boring but your eyes don’t get tired)
The body text should be AT LEAST 11pt, preferably 12pt. I know that sounds big but remember people are reading this from a couple feet away while they’re cooking, not holding it up to their face. I made everything 10pt once and got reviews complaining about it. Learned that lesson.
Color Schemes
If you’re doing full color interior (more expensive to print but looks way better), pick a color scheme and stick with it. I usually pull colors from food photography or just keep it simple with:
- Black text on white background (classic, readable, cheap to print)
- One accent color for headers, dividers, or decorative elements
- Maybe a second lighter shade of that accent color for backgrounds or boxes
Earth tones work great for cookbooks – sage green, terracotta, warm browns. The super bright colors like hot pink or electric blue can work for specific niches (like a kids cookbook) but usually feel off-brand for food.
Images and Photo Placeholders
This is gonna sound weird but you don’t need photos for every single recipe. I know everyone thinks cookbooks need to be full of gorgeous food photography but that’s expensive and time-consuming and honestly? Some of my best-selling cookbooks have minimal photos.
If you ARE using photos:
- Keep them consistent size and placement – if recipe one has a 4×3 inch photo top right, every recipe should follow that same pattern
- Use high resolution – at least 300 DPI for print, KDP will reject anything too low quality
- Consider using simple illustrated icons instead of photos – there’s tons of food illustration packs on Creative Market or Etsy
For my templates, I create placeholder boxes where photos will go. Just a light gray box with “PHOTO” written in it so I remember to drop images in before I publish. In InDesign you can create actual image frames that make this super easy.
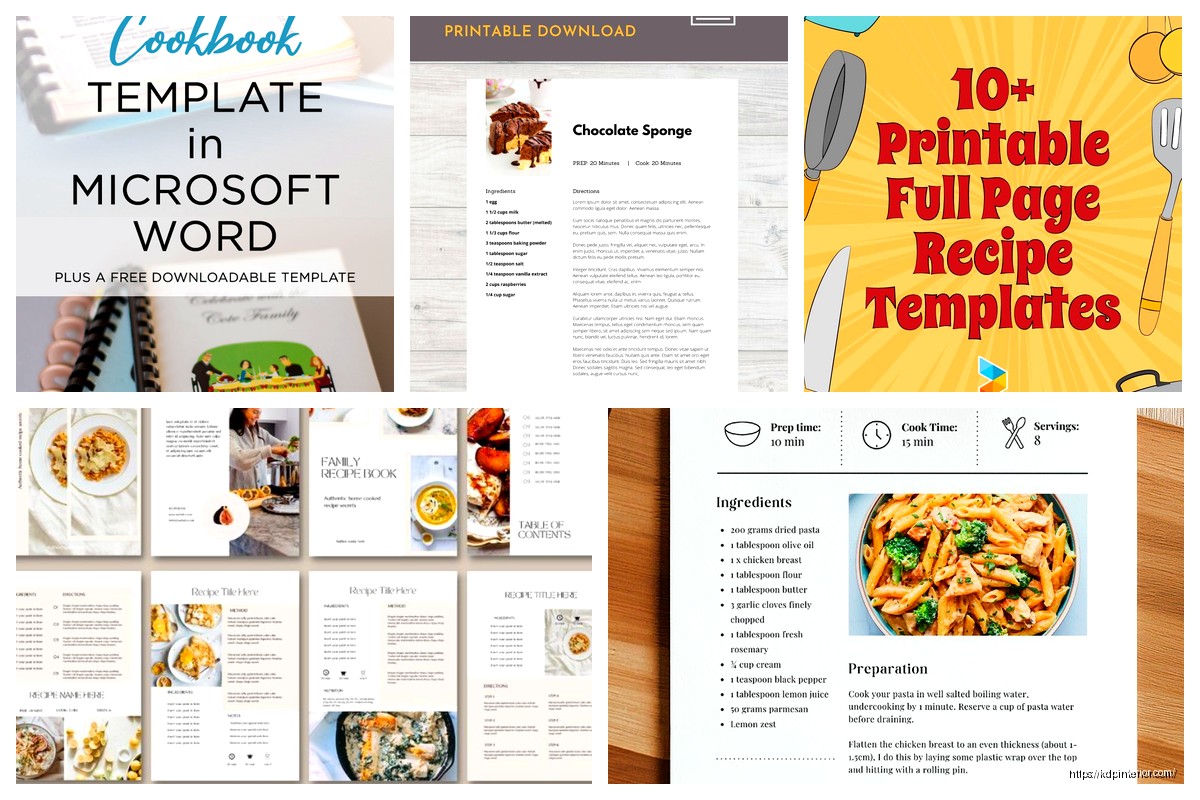
The Recipe Page Template Itself Step By Step
Alright let me walk through how I actually build the main recipe page template because this is the thing you’ll duplicate 50-100 times.
I’m gonna use an 8×10 book as the example since that’s most common:
Step 1: Set up your page with margins. I do 0.5″ on top, outside, and bottom. 0.75″ on the inside (gutter). This gives you a safe zone where text won’t get cut off or lost in the binding.
Step 2: Add a header area at the top – about 1-1.5 inches tall. This is where your recipe title goes. I put a thin line or decorative element under it to separate it from the body content.
Step 3: Create an info line under the title – smaller text with Prep Time: ___ Cook Time: ___ Servings: ___. I format this as a table or just use tab stops to keep everything aligned.
Step 4: Decide on your layout – side by side columns or stacked sections. For side by side, I make the left column about 40% of the width (ingredients) and right column 60% (instructions). Make sure there’s some white space between them, like 0.25 inches minimum.
Step 5: Format your ingredients list. I use a bulleted list or checkbox bullets. The text is usually the same size as body text but sometimes I bold the ingredient names and keep measurements in regular weight.
Step 6: Format your instructions as a numbered list. Each step is its own paragraph. I usually add a little space between steps so they don’t blur together.
Step 7: Add your photo placeholder. I usually put this either at the very top (above the title) or in the top right corner next to the ingredients. Make sure it has enough resolution space – at least 3×4 inches for print clarity.
Step 8: Optional notes section at the bottom – just a small text box with “Notes:” or “Tips:” as a header. Maybe 2-3 inches of space for recipe variations or storage instructions.
Step 9: Add page numbers in the footer – I put them centered or outside corner. Make sure they’re big enough to read, like 10-11pt.
There you go, that’s your master template page. Save it, duplicate it, and you’re ready to start filling in recipes.
Section Dividers Make Everything Look More Professional
Okay so funny story, I published my first cookbook without any section dividers and it just felt like this blob of recipes. No visual breaks, nothing to help people navigate. Added section dividers to my next one and suddenly it felt like a real published cookbook.
Section dividers are just pages that separate different categories of recipes. Like before all your breakfast recipes start, you have a page that just says “BREAKFAST & BRUNCH” in big letters, maybe with a decorative element or relevant photo.
You can make these simple or fancy:
- Simple version: Category name centered on the page in large font, maybe a line or decorative element
- Fancy version: Full page photo with category name overlaid, or illustrated design
These divider pages also help with page count if you need to hit a certain number for KDP’s pricing tiers. Win-win.
Testing Your Template Before You Fill In 100 Recipes
Do NOT make the mistake of building out your entire cookbook before testing your template. I’ve done this and it’s a nightmare to fix later.
Here’s what I do now:
Create your template layout, then fill in THREE complete recipes. Pick different types – maybe one with a long ingredients list, one with complex instructions, one that’s super simple. Format them completely, add photos if you’re using them, make it look final.
Then export a PDF and upload it to KDP’s previewer tool. Look at it on your phone, on your computer, use their print preview if you can. Check for:
- Is everything readable? Text big enough?
- Do the page margins look right? Nothing too close to the edge?
- Do images look clear or pixelated?
- Does the layout feel balanced or is everything squished to one side?
- Can you actually imagine using this in a kitchen?
If something feels off, fix it NOW before you’ve built 75 more pages. Trust me on this.
The Back Matter That Might Actually Help Sales
So everyone focuses on the front and middle of the book but the back matter is where you can sneak in some useful stuff and maybe even drive more sales.
What I include at the end:
- Index (if you have lots of recipes – alphabetical list of everything with page numbers)
- Blank recipe pages (people LOVE these – give them 5-10 blank templates they can write their own recipes in)
- Notes pages (just lined or blank pages for shopping lists or meal planning)
- About the author page (keep it short, mention other cookbooks you’ve published)
- Call to action page (ask for reviews, list your other books)
The blank recipe pages are seriously underrated. I started including them after watching my mom’s old cookbooks and realizing half the value was in the handwritten recipes she’d added on blank pages in the back. Give people space to customize and they’ll actually use your cookbook more.
DISCOVER OUR FREE BEST SELLING PRODUCTS
Editable Canva Lined Journal: Express Your Thoughts – KDP Template
Lined Pages Journal 120 pages Ready to Upload PDF Commercial Use KDP Template 6×9 8.5×11 5×8 for Notebooks, Diaries, Low Content
Lined Pages Journal 120 pages Ready to Upload PDF Commercial Use KDP Template 6×9 8.5×11 5×8 for Notebooks, Diaries, Low Content
Cute Dogs Coloring Book for Kids | Activity Book | KDP Ready-To-Upload
Daily Planner Diary : Diary Planners for Everyday Productivity, 120 pages, 6×9 Size | Amazon KDP Interior
Wolf Coloring KDP interior For Adults, Used as Low Content Book, PDF Template Ready To Upload COMMERCIAL Use 8.5×11"
Coloring Animals Head Book for Kids, Perfect for ages 2-4, 4-8 | 8.5×11 PDF
Printable Blank Comic Book Pages PDF : Create Your Own Comics – 3 Available Sizes
Notes KDP interior Ready To Upload, Sizes 8.5×11 6×9 5×8 inch PDF FILE Used as Amazon KDP Paperback Low Content Book, journal, Notebook, Planner, COMMERCIAL Use
Black Lined Journal: 120 Pages of Black Lined Paper Perfect for Journaling, KDP Notebook Template – 6×9
Student Planner Journal 120 pages Ready to Upload PDF Commercial Use KDP Template 6×9" 8.5×11" for Low Content book
Recipe Journal Template – Editable Recipe Book Template, 120 Pages – Amazon KDP Interior