-
×
 Daily Planner Diary : Diary Planners for Everyday Productivity, 120 pages, 6×9 Size | Amazon KDP Interior
1 × $0.00
Daily Planner Diary : Diary Planners for Everyday Productivity, 120 pages, 6×9 Size | Amazon KDP Interior
1 × $0.00
Subtotal: $0.00
Daily Planner Diary : Diary Planners for Everyday Productivity, 120 pages, 6×9 Size | Amazon KDP Interior
1 × $0.00 Subtotal: $0.00
Okay so menu booklet design is one of those things that seems super straightforward until you actually sit down to do it for a client, and then you realize there’s like a million small decisions that can completely tank the whole project.
I’ve been helping restaurants with this stuff for about three years now and the biggest mistake I see is people treating menu booklets like they’re just regular ebooks. They’re not. The print specifications are different, the user experience is totally different, and honestly the stakes are higher because a badly designed menu actively costs a restaurant money every single day it’s in use.
First thing – you gotta nail down the physical size before you do anything else. Most restaurants go with either 8.5×11 inches (standard letter) or 5.5×8.5 inches (half letter). The half letter size is my favorite for most places because it feels more premium, fits better on tables, and the printing costs aren’t that much different if you’re doing it smart.
But here’s where it gets tricky – you need to think about whether this is gonna be saddle-stitched (stapled in the middle) or perfect bound (glued spine like a paperback). For anything under 40 pages, saddle-stitch is your best bet. It lays flat on tables which is huge for usability. Perfect binding looks fancier but adds cost and those menus don’t stay open well unless someone’s holding them.
I did a project last month for this Italian place in Portland and they insisted on perfect binding for a 24-page menu and… yeah it was a disaster. Customers kept having to hold the menu open with both hands. The owner called me two weeks later asking if we could redo it. We went saddle-stitch and suddenly no more complaints.
This is gonna sound weird but page count has to be divisible by 4 when you’re doing saddle-stitch. Like, you can’t have a 22-page menu. It has to be 20 or 24. This is because of how the paper folds and prints. I’ve had designers send me files with 23 pages and I’m like… we literally cannot print this the way you want.
So when you’re planning content, map it out in 4-page increments. Cover (front and back) = 2 pages, then you’ve got your inside spreads. A typical small restaurant menu might be 12 pages total – front cover, 8 inside pages of content, back cover, inside front and inside back for specials or wine lists or whatever.
You need 0.125 inch bleed on all sides. This means your design elements extend past the trim line so when the cutting happens there’s no white edges. I use 0.5 inch margins minimum from the trim line for any text or important design elements.
Oh and another thing – if you’re doing saddle-stitch, add extra margin in the gutter (the middle binding area). Like 0.75 inches there instead of 0.5. Text that disappears into the fold looks so unprofessional and there’s no fixing it after printing.
Most of my restaurant clients come to me with zero design experience so I’ve streamlined this process a lot. I use Adobe InDesign for the actual layout work but honestly if you’re just starting out, Canva Pro has menu templates that are surprisingly decent. The problem with Canva is you have less control over print specs and bleed settings.
For InDesign, set up your document like this:
– Intent: Print
– Number of pages: whatever number divisible by 4
– Facing Pages: checked (this lets you see spreads)
– Page size: custom, enter your dimensions
– Bleed: 0.125 inches all sides
– Slug: 0 (you don’t need it)
I usually create master pages with the basic grid and margin guides, then build out individual pages from there. Saves so much time when you need to make changes later.
Export as PDF/X-1a for professional printing. This is important – regular PDFs can have issues with color profiles and fonts. PDF/X-1a embeds everything and uses CMYK color mode which is what commercial printers need.
Wait I forgot to mention – always design in CMYK from the start, not RGB. RGB colors look great on screen but will print totally different. I learned this the hard way on my first restaurant project where this beautiful bright teal turned into a muddy blue-green. The client was NOT happy.
Menu typography is its own beast. You need hierarchy, readability, and some personality but not so much that it’s distracting from the actual food items.
I typically use three fonts max:
– Headers/category names: something with personality that matches the restaurant vibe
– Item names: clean, highly readable, medium weight
– Descriptions and prices: smaller, lighter weight of the same font as item names
Font size minimum for body text should be 10pt but honestly I go with 11pt or 12pt because a lot of restaurants have older customers and dim lighting. Nobody’s gonna complain that the text is too easy to read.
My dog just knocked over my water bottle all over my desk… anyway where was I.
Don’t use leader dots for prices (you know, those dots that go Item Name………$12). They look dated and cheap. Instead, align prices to the right margin and keep item names/descriptions left-aligned. The white space between is fine, people’s eyes can track across it.
Or do the price right after the description in the same line. Like “House-made lasagna with ricotta and bolognese sauce 18” – this works really well for more casual places.
This is where restaurants waste so much money. They design this gorgeous menu with specific brand colors and then it prints completely wrong because they didn’t handle color management properly.
You need to work in CMYK color space and if your restaurant has specific brand colors, get the CMYK values from them. If they only have RGB or hex codes, you’ll need to convert them but understand that some colors (especially bright oranges, blues, and purples) cannot be accurately reproduced in CMYK. They’ll be duller.
For critical color matching, you might need Pantone spot colors but this costs more to print. Most restaurants don’t actually need this unless their brand identity is really tight.
Paper weight matters more than people think. I use 100lb gloss cover stock for covers and 80lb text for inside pages. Gloss is more durable and wipes clean which is huge for restaurants. Matte looks fancier but shows fingerprints and dirt immediately.
Some places want uncoated paper for that artisanal feel but honestly in a restaurant environment it’s impractical. Spills happen, hands are greasy, and uncoated paper absorbs everything.
Okay so funny story – I once designed a menu where we put all the high-margin items at the bottom of each section thinking people would scan everything. Nope. Eye-tracking shows people focus on the top right area of a menu first, then top left, then middle. Bottom items get ignored unless someone’s really studying the whole thing.
So now I always put the items the restaurant wants to sell most in those prime positions. Usually that’s:
– Top right of the right page in a spread
– Top left of right page
– Top right of left page
Most menus follow this flow:
– Appetizers/Starters
– Salads (if applicable)
– Main courses (sometimes split by protein type)
– Sides
– Desserts
– Beverages
But you can mess with this depending on the restaurant type. Breakfast places might go: Breakfast classics, Pancakes & Waffles, Omelets, Sides, Beverages.
The key is logical flow that matches how people think about ordering food. Don’t make them hunt for stuff.
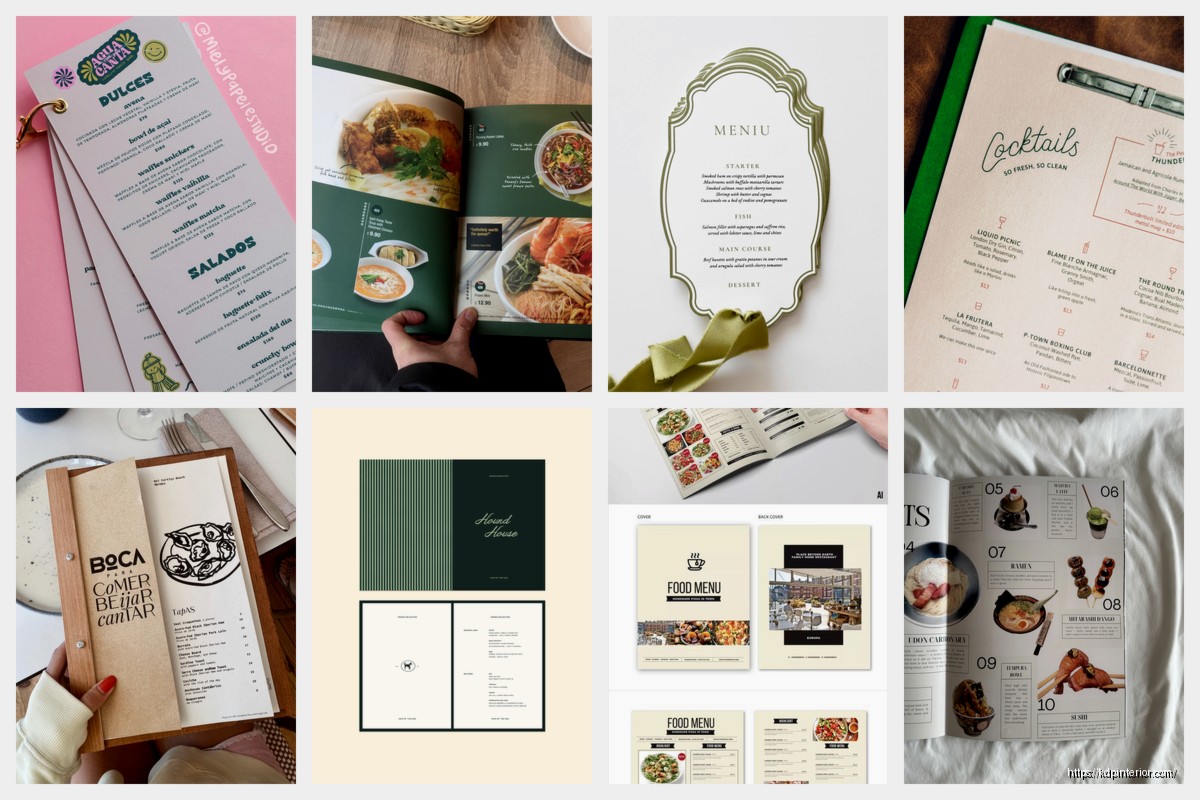
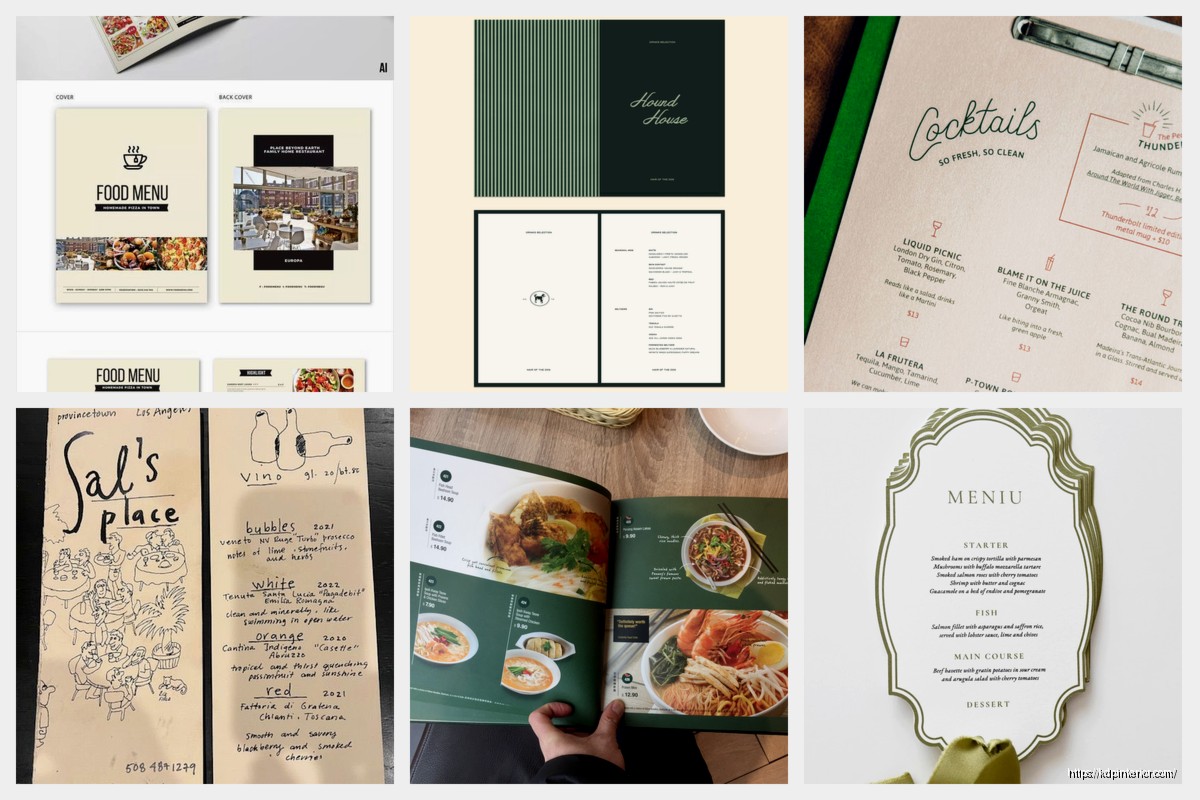
This is a huge debate in restaurant design. High-end places usually go text-only with maybe some subtle graphic elements. Casual places often use photos.
Here’s my take: if you’re gonna use photos, they need to be REALLY good. Like professional food photographer good. Bad food photography makes everything look worse and actually hurts sales. I’d rather do a text-only menu than use mediocre photos.
Illustrations can work as a middle ground, especially for specific items or to add visual interest without committing to full photography. I did a menu for a taco place that used simple line illustrations of different peppers and ingredients scattered throughout and it looked great.
New designers always try to cram too much onto each page. Don’t do this. White space (or negative space) makes everything more readable and gives the design room to breathe.
I aim for about 40% white space on menu pages. Yeah, really. This means your actual content – text, images, design elements – takes up like 60% of the page. It feels wrong when you’re designing but it looks professional when printed.
You’ve got a few routes here:
Local print shops – good for smaller quantities (under 100), you can check quality in person, usually more expensive per unit. I use these for initial prototypes always.
Online print services (PrintPlace, GotPrint, UPrinting) – better pricing for larger quantities, good quality if you set up files correctly, slower turnaround usually.
Amazon KDP for menu booklets – okay so this is actually a hack I use sometimes. If the restaurant wants the ability to update their menu frequently without big printing costs, you can publish it as a “cookbook” or “guide” on KDP and order author copies at cost. Works best for perfect bound menus. The quality is decent and you can order like 5 copies at a time for cheap.
Most restaurants need fewer menus than they think. A typical small restaurant (40-50 seats) might only need 20-25 physical menus. They don’t give one to every table, servers bring them and collect them.
But you want extras for backup when menus get damaged. I usually recommend ordering 50% more than the minimum needed. So if they need 20, order 30.
I keep this checklist saved because I’ve screwed up enough times to learn:
– All fonts embedded or outlined
– All images CMYK, 300 DPI minimum
– Bleed extended properly on all pages
– No spot colors unless intentional
– Page count divisible by 4
– PDF/X-1a format
– File size reasonable (under 100MB usually)
Oh and another thing – always order a proof copy before doing a full print run. Always. I don’t care what the preview looks like on screen. Print one, look at it in person, have the restaurant owner look at it. Fix any issues, THEN do the full order.
Fast casual places can get away with simpler designs, maybe even laminated single sheets instead of booklets. Fine dining needs that premium feel – thicker paper, maybe textured cover stock, sophisticated typography.
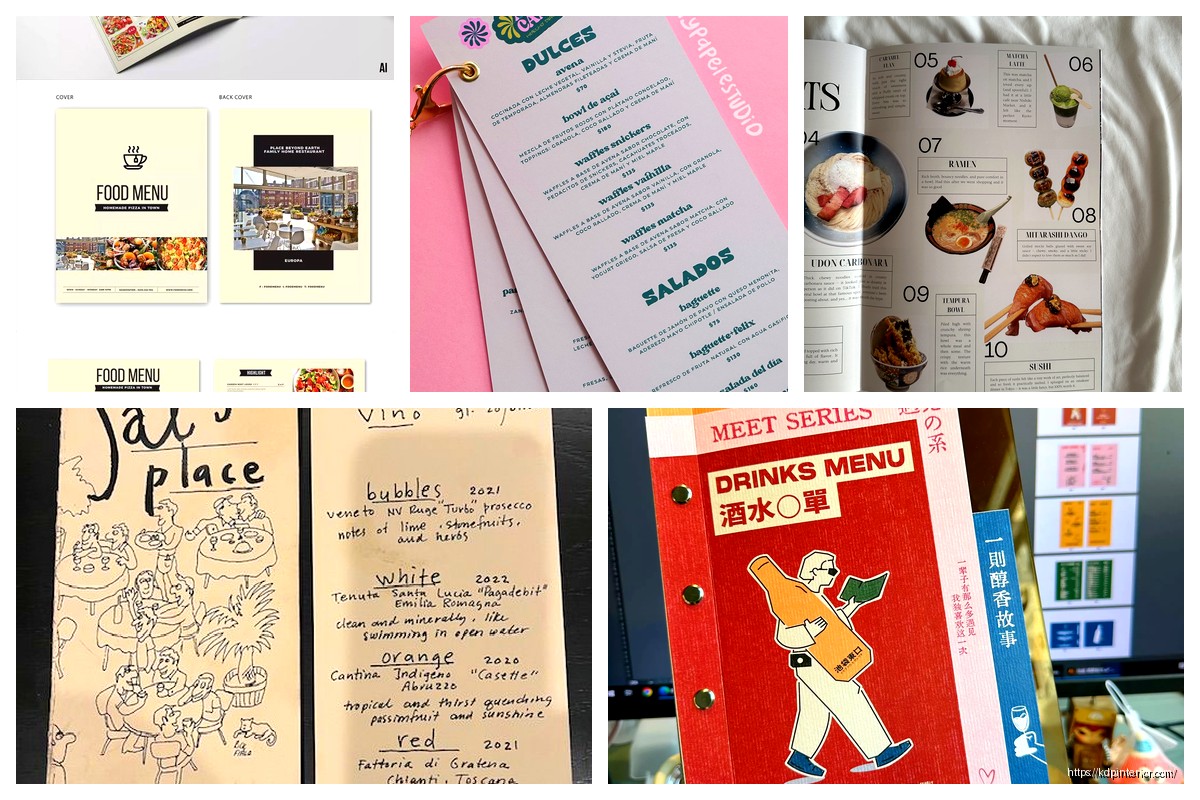
Bars and breweries often need separate menus for food and drinks, or a combo where drinks take up more space. The design can be more casual and fun with these.
Coffee shops usually do better with board menus but if they want printed, small format works best, like 4×6 inches that can sit on counters.
Menus change. Prices change, items rotate seasonally, suppliers change. Build this into your design from the start.
Some restaurants use printed inserts for specials rather than reprinting the whole menu. Others do QR codes to digital menus for items that change frequently (I know, I know, but it actually works well for wine lists and seasonal specials).
If you’re designing a menu that’ll need updates, keep your source files organized and documented. Use paragraph styles and character styles in InDesign so changing fonts or sizes across the whole document takes seconds not hours.
The biggest thing is just getting that first one done and printed. You’ll learn so much from seeing the physical product that no amount of screen design can teach you. My first restaurant menu had prices that were too small and nobody mentioned it until it was printed and suddenly everyone’s squinting. Live and learn, right?
DISCOVER OUR FREE BEST SELLING PRODUCTS
Editable Canva Lined Journal: Express Your Thoughts – KDP Template
Lined Pages Journal 120 pages Ready to Upload PDF Commercial Use KDP Template 6×9 8.5×11 5×8 for Notebooks, Diaries, Low Content
Lined Pages Journal 120 pages Ready to Upload PDF Commercial Use KDP Template 6×9 8.5×11 5×8 for Notebooks, Diaries, Low Content
Cute Dogs Coloring Book for Kids | Activity Book | KDP Ready-To-Upload
Daily Planner Diary : Diary Planners for Everyday Productivity, 120 pages, 6×9 Size | Amazon KDP Interior
Wolf Coloring KDP interior For Adults, Used as Low Content Book, PDF Template Ready To Upload COMMERCIAL Use 8.5×11"
Coloring Animals Head Book for Kids, Perfect for ages 2-4, 4-8 | 8.5×11 PDF
Printable Blank Comic Book Pages PDF : Create Your Own Comics – 3 Available Sizes
Notes KDP interior Ready To Upload, Sizes 8.5×11 6×9 5×8 inch PDF FILE Used as Amazon KDP Paperback Low Content Book, journal, Notebook, Planner, COMMERCIAL Use
Black Lined Journal: 120 Pages of Black Lined Paper Perfect for Journaling, KDP Notebook Template – 6×9
Student Planner Journal 120 pages Ready to Upload PDF Commercial Use KDP Template 6×9" 8.5×11" for Low Content book
Recipe Journal Template – Editable Recipe Book Template, 120 Pages – Amazon KDP Interior