Okay so I just reworked like three of my plotting templates last month and here’s what actually works when you’re trying to structure a novel arc without losing your mind.
The thing nobody tells you about plotting templates is they’re not supposed to be these rigid paint-by-numbers things. I spent probably two years making templates way too complicated before I figured out the sweet spot is like… structured enough that you don’t get lost but flexible enough that your story can breathe, you know?
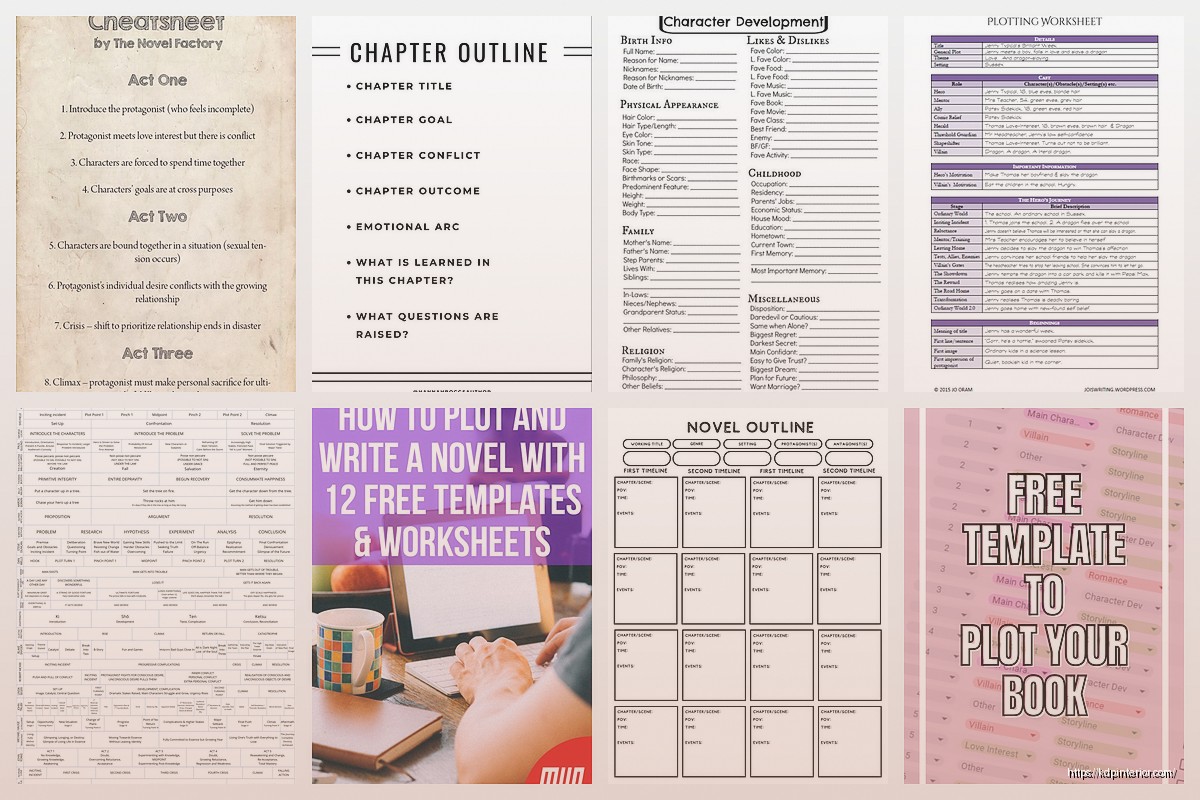
The Basic Three-Act Structure Template
Start with the classic three-act thing because honestly it’s classic for a reason. Your template should break down like this: Act 1 is roughly 25% of your book, Act 2 is 50%, Act 3 is 25%. I know everyone says this but when you’re actually plotting it out in a spreadsheet or whatever, seeing those percentages mapped to actual chapter numbers changes everything.
So let’s say you’re writing an 80,000-word novel. That’s probably around 25-30 chapters depending on your chapter length. Act 1 would be chapters 1-7ish, Act 2 runs chapters 8-20, Act 3 is chapters 21-27. Having this visual breakdown in your template means you can literally see when you’re dragging too long in the setup or rushing the ending.
What Goes in Each Section
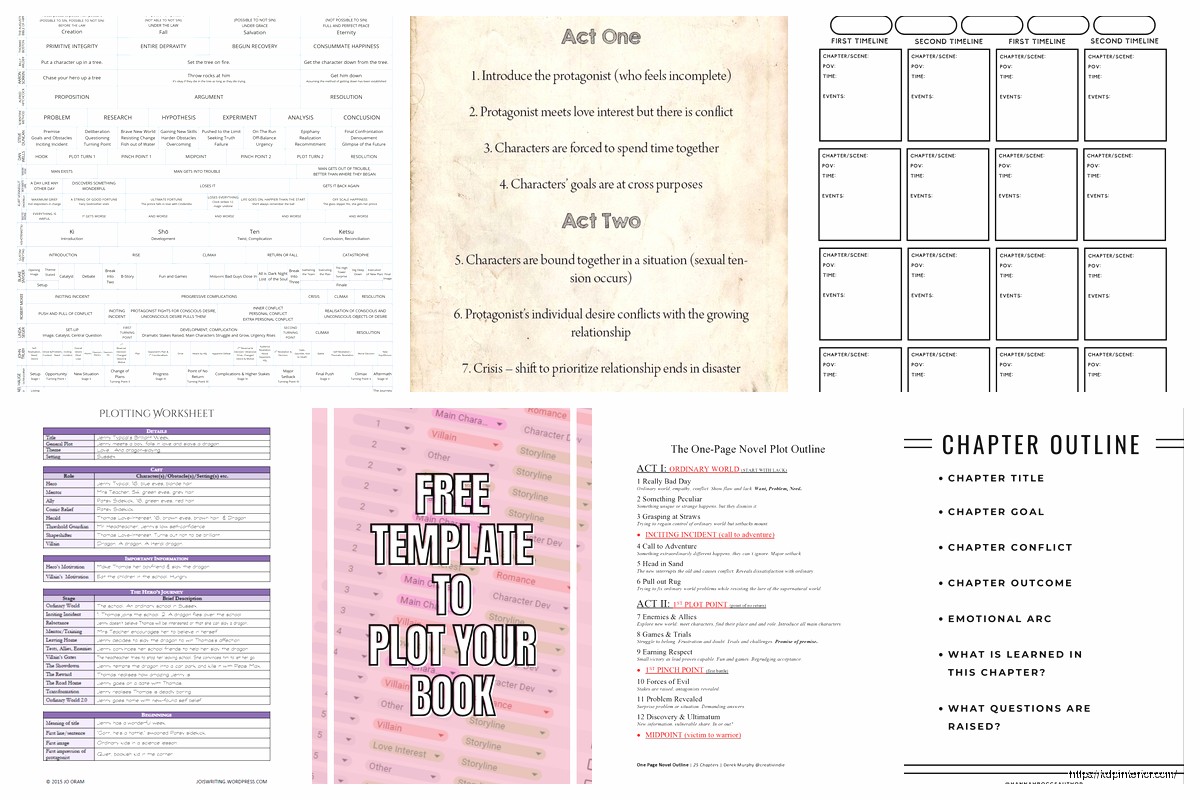
Act 1 needs your inciting incident, obviously. But the template should have space for the “normal world” setup because I see so many manuscripts where the author just… forgets to show us why we should care before blowing everything up. Your protagonist’s ordinary life, the thing that’s about to get disrupted, that goes right at the top.
The inciting incident should hit around 10-12% into your story. Not the first chapter unless you’re writing a thriller. My dog literally just knocked over my coffee while I’m writing this but anyway yeah that 10-12% mark is crucial.
Then you need the first plot point around the 25% mark. This is where your protagonist commits to the journey, crosses the threshold, whatever you wanna call it. In your template this should be a clear beat with space to write what changes for your character at this moment.
The Messy Middle Template Section
Act 2 is where most people’s templates fall apart because Act 2 is where most novels fall apart. Here’s what I do: divide Act 2 into two parts at the midpoint. That midpoint around 50% needs to be a major shift—new information, false victory, false defeat, something that changes the trajectory.
Your template should have:
- Rising action beats – I usually map out 5-7 major scenes here
- Character relationship developments because subplots matter
- A pinch point around 37% where you remind readers of the stakes
- The midpoint at 50% – this is non-negotiable
- Another pinch point around 62%
- The second plot point or “all is lost” moment around 75%
Wait I forgot to mention – between each of these beats, leave space in your template for the reaction/sequel scenes. This is something I literally never did in my first like fifty templates and it made my plotting so much weaker. Every action needs a reaction, every disaster needs a moment where your character processes it.
The Midpoint Specifically
The midpoint deserves its own section in your template because it’s doing heavy lifting. This isn’t just another scene—it’s the moment that splits your story’s energy. Before the midpoint, your protagonist is usually reacting to events. After the midpoint, they should start being more proactive.
In my template I have three questions at the midpoint section:
- What does the protagonist learn or gain here?
- How does this information change their approach?
- What ticking clock gets introduced or intensified?
I was watching this show the other night, can’t remember which one, but they completely botched their midpoint and the whole second half dragged because of it. Don’t let that be your novel.
Character Arc Integration
Okay so this is gonna sound weird but your plotting template needs to run parallel to your character arc template. I used to keep these separate and it was a disaster. Now I have columns or sections that track both the external plot beats AND the internal character development at each point.
For each major plot point in your template, add a corresponding character arc note. At the inciting incident – what does this reveal about your character’s internal flaw or wound? At the midpoint – how does their perspective shift? At the all-is-lost moment – what lie do they finally confront?
The protagonist’s character arc should hit these internal beats:
- Introduction showing their flaw/wound in action
- Resistance to change (early Act 2)
- First attempt at change that fails (leading to midpoint)
- Recommitment to old ways or brief success with new ways (post-midpoint)
- Crisis that forces real change (around 75%)
- Final test proving the change (climax)
- New normal showing growth (resolution)
The Template Structure I Actually Use
My personal template is a spreadsheet with these columns: Chapter Number, Estimated Word Count, Plot Beat, Character Arc Beat, Subplot Tracking, Emotional Tone, and Notes. Some people prefer a more visual approach like index cards or Scrivener’s corkboard but honestly whatever works for your brain.
The subplot tracking column is clutch. You gotta know where your romance subplot peaks, where your secondary character’s arc intersects with the main plot, where you’re weaving in that thematic element about family or whatever. I color-code mine—red for romance, blue for the mystery subplot, green for the mentor relationship arc.
Scene-Level Template Details
Under each major beat, I break it down into actual scenes. Each scene in the template gets:
- POV character
- Scene goal
- Conflict/obstacle
- Disaster/outcome
- Reaction/decision leading to next scene
This scene-reaction structure keeps your pacing tight. Every scene should end with something going wrong or unexpectedly right, then the next scene starts with your character dealing with that outcome.
The Climax and Resolution Template
Act 3 needs careful plotting in your template because you’re juggling a lot. The climax around 90-95% should be the convergence of your external plot resolution AND your character’s internal arc completion. In the template, I literally draw arrows showing how each subplot thread ties up before or during the climax.
Your template should separate the climax from the resolution. Climax is the big confrontation, the battle, the confession, whatever. Resolution is the aftermath – showing the new normal, tying up loose ends, proving the character has actually changed.
I usually allocate one chapter for climax and 1-2 chapters for resolution depending on the genre. Romance might need more resolution to show the relationship’s future. Thrillers can end faster once the threat’s neutralized.
Flexibility Points in the Template
Here’s the thing though – and this took me forever to learn – your template needs built-in flexibility markers. I mark certain beats as “flexible” and others as “anchor points.” The anchor points are non-negotiable: inciting incident, first plot point, midpoint, second plot point, climax. These keep your structure solid.
The flexible beats can move around as you write. Maybe that pinch point works better at 35% instead of 37%. Maybe you need an extra subplot scene between the midpoint and the second plot point. Your template should allow for this without the whole structure collapsing.
Genre-Specific Template Adjustments
Romance novels need the relationship beats tracked alongside plot beats. Your template should include the first meeting, first kiss, commitment, black moment (usually around that 75% mark), and reconciliation. These beats are as important as your plot structure.
Mystery/thriller templates need clue placement tracking. Where does each piece of evidence get revealed? When do red herrings appear? The template should ensure you’re not dumping all the clues at once or spacing them so far apart that readers lose the thread.
Fantasy templates need worldbuilding integration markers. You can’t infodump everything in chapter one, so the template should track where you reveal magic system rules, political structures, history, etc.
Testing Your Template
After you fill out the template but before you start drafting, do this quick test: read through just the plot beats in order. Does the story escalate? Does each beat raise the stakes or deepen the conflict? If you’re reading through and thinking “this feels flat” or “this is repetitive,” fix it now in the template stage.
Also check your pacing by looking at word counts between major beats. If you’ve got 15,000 words between the inciting incident and first plot point but only 5,000 words between the midpoint and second plot point, something’s off.
Oh and another thing – share your template with a writing buddy before drafting. Not the whole thing, just the major beats. See if they can follow the story logic. I’ve caught so many plot holes this way that would’ve been a nightmare to fix in revision.
Common Template Mistakes
Don’t make your template so detailed that it kills the joy of discovery writing. If you’re plotting out every single scene beat before you write, you might lose the spontaneity that makes first drafts fun. Leave room for inspiration.
Also don’t ignore the template once you start drafting. I used to do this—spend days on the perfect template then completely abandon it after chapter three. Now I keep the template open while writing and update it as the story evolves. It’s a living document, not a prison.
And honestly the biggest mistake is thinking one template works for every story. I have like five different base templates now depending on whether I’m writing romance, mystery, fantasy, or contemporary fiction. The bones are similar but the specifics shift based on genre expectations and story needs.
Your template should make the writing easier, not harder. If you’re constantly fighting against your template or it feels like a chore to fill out, simplify it. The goal is to have enough structure that you don’t get lost but not so much that you’re suffocated.
 Black Lined Journal: 120 Pages of Black Lined Paper Perfect for Journaling, KDP Notebook Template - 6×9
1 × $0.00
Black Lined Journal: 120 Pages of Black Lined Paper Perfect for Journaling, KDP Notebook Template - 6×9
1 × $0.00  Coloring Animals Head Book for Kids, Perfect for ages 2-4, 4-8 | 8.5x11 PDF
1 × $0.00
Coloring Animals Head Book for Kids, Perfect for ages 2-4, 4-8 | 8.5x11 PDF
1 × $0.00 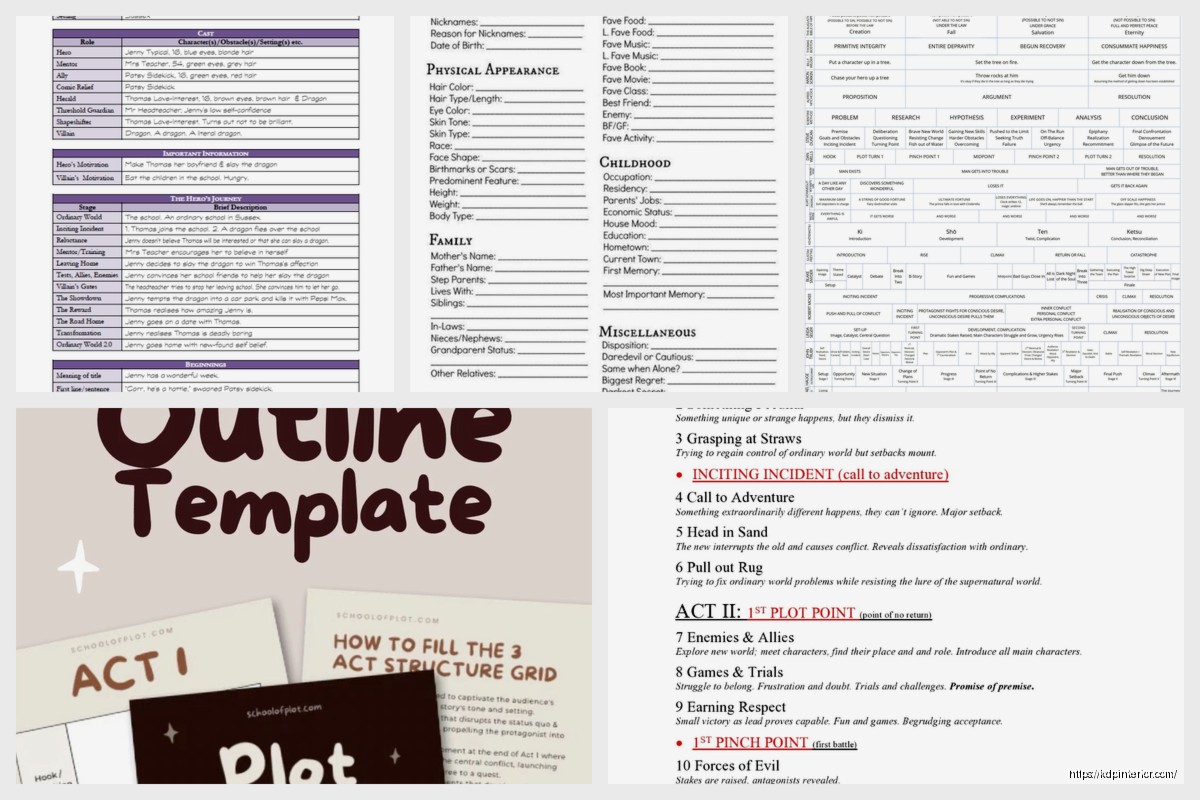
DISCOVER OUR FREE BEST SELLING PRODUCTS
Editable Canva Lined Journal: Express Your Thoughts – KDP Template
Lined Pages Journal 120 pages Ready to Upload PDF Commercial Use KDP Template 6×9 8.5×11 5×8 for Notebooks, Diaries, Low Content
Lined Pages Journal 120 pages Ready to Upload PDF Commercial Use KDP Template 6×9 8.5×11 5×8 for Notebooks, Diaries, Low Content
Cute Dogs Coloring Book for Kids | Activity Book | KDP Ready-To-Upload
Daily Planner Diary : Diary Planners for Everyday Productivity, 120 pages, 6×9 Size | Amazon KDP Interior
Wolf Coloring KDP interior For Adults, Used as Low Content Book, PDF Template Ready To Upload COMMERCIAL Use 8.5×11"
Coloring Animals Head Book for Kids, Perfect for ages 2-4, 4-8 | 8.5×11 PDF
Printable Blank Comic Book Pages PDF : Create Your Own Comics – 3 Available Sizes
Notes KDP interior Ready To Upload, Sizes 8.5×11 6×9 5×8 inch PDF FILE Used as Amazon KDP Paperback Low Content Book, journal, Notebook, Planner, COMMERCIAL Use
Black Lined Journal: 120 Pages of Black Lined Paper Perfect for Journaling, KDP Notebook Template – 6×9
Student Planner Journal 120 pages Ready to Upload PDF Commercial Use KDP Template 6×9" 8.5×11" for Low Content book
Recipe Journal Template – Editable Recipe Book Template, 120 Pages – Amazon KDP Interior